The kitchen window panel
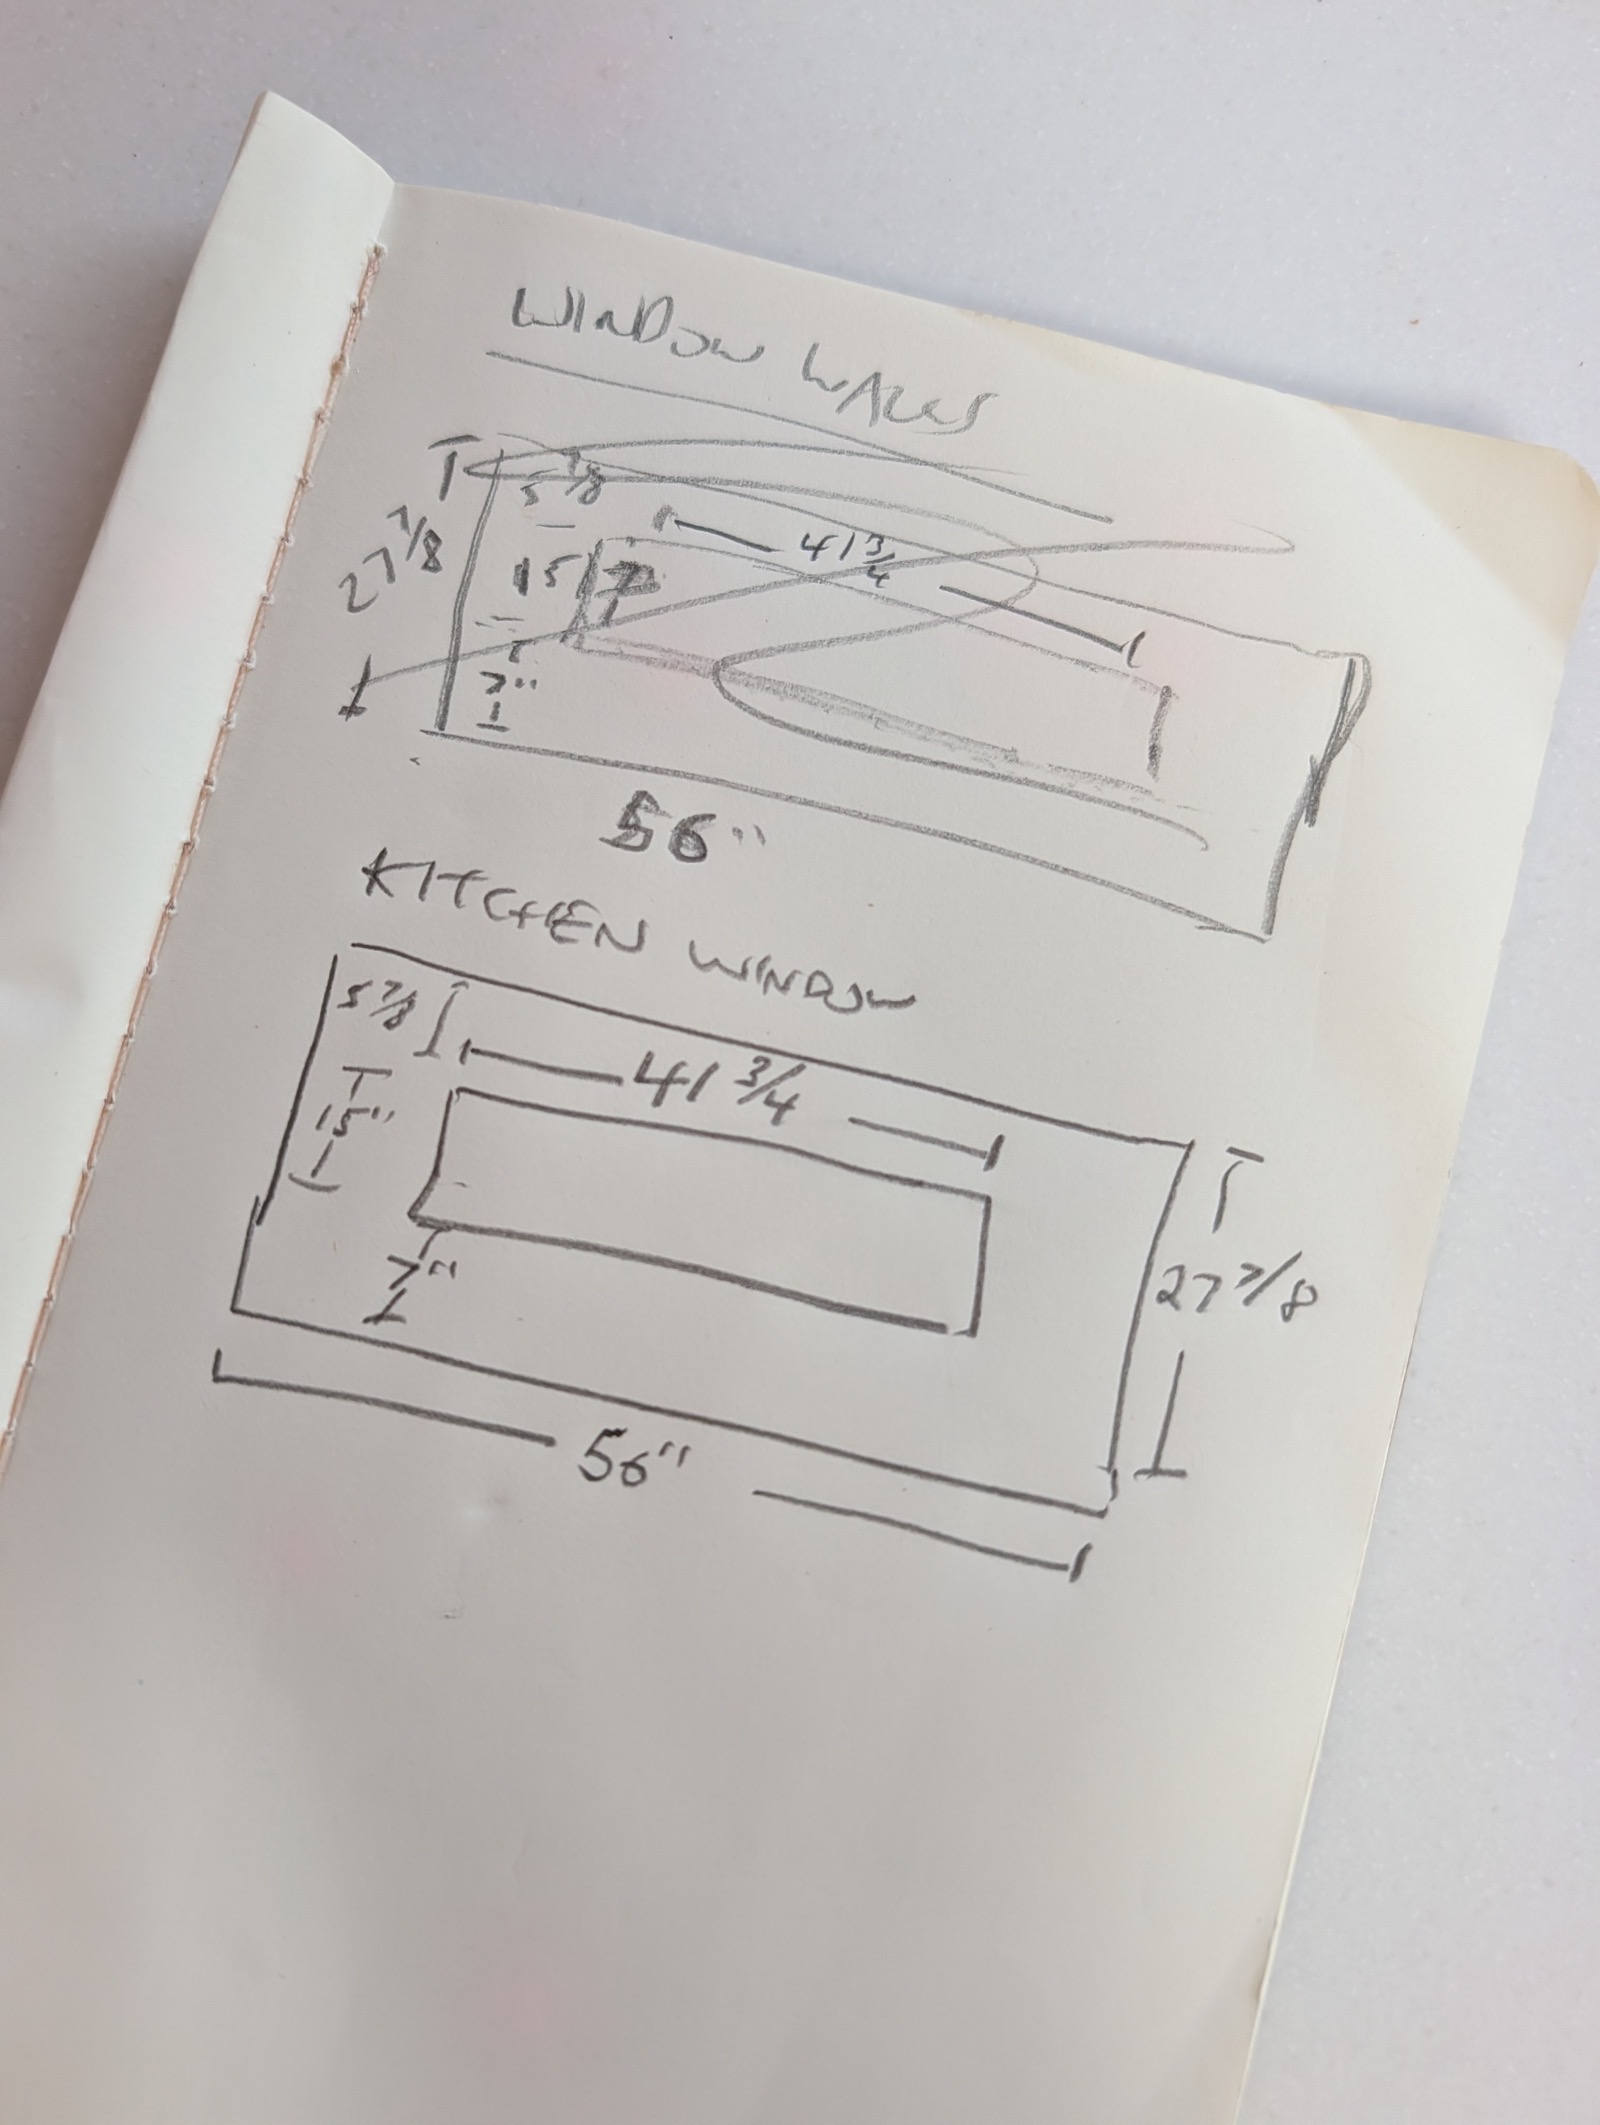
The first removable panel: 1/4" Baltic birch, 56" x 27 7/8" with a 41 3/4" x 15" window cutout, microcemented at the bench, standing on the counter, held flat by magnets on a laminated poplar rail. The system it follows lives on the walls & windows page.
1The panel
The cut sheet: the blank alone, to scale, every dimension on it. Solid dimensions are off the notebook; the dashed side margins are the 14 1/4" total split evenly, which is assumed, not stated. Corners of the cutout get radiused, not squared.
Eight magnets: six into the rail around the window, two on the outer verticals. None top or bottom, because the bracket and the counter already hold those.
Three things hold the panel and they do different jobs. The counter takes the weight, about 11 lb, so the magnets carry none of it. The bracket steadies the top. The magnets only hold it flat to the wall and stop it drumming.
2Cut through the window
The panel reads as two pieces because the section passes through the hole. It is one panel with a cutout.
3The rail and the groove
One groove, 3/4" wide by 1/4" deep, cut in the 2" face. The magnet screws to the groove floor and the keeper enters the same groove. One router pass, no Forstner pockets.
3/16" of magnet plus 1/16" of keeper is the 1/4", so the panel still beds flat on the rail either side of the groove. The keeper must be narrower than the groove, 1/2" in a 3/4", which leaves 1/8" a side of tolerance for putting the panel back in the same place. Ease the groove edges so the keeper guides itself in.
Every cut is in the rail, never in the panel. The rail is 1.5" thick and can lose 1/4" without noticing. The panel is 1/4" ply with brittle finish on the far face, and a 3/16" magnet recessed into it would leave about one ply behind.
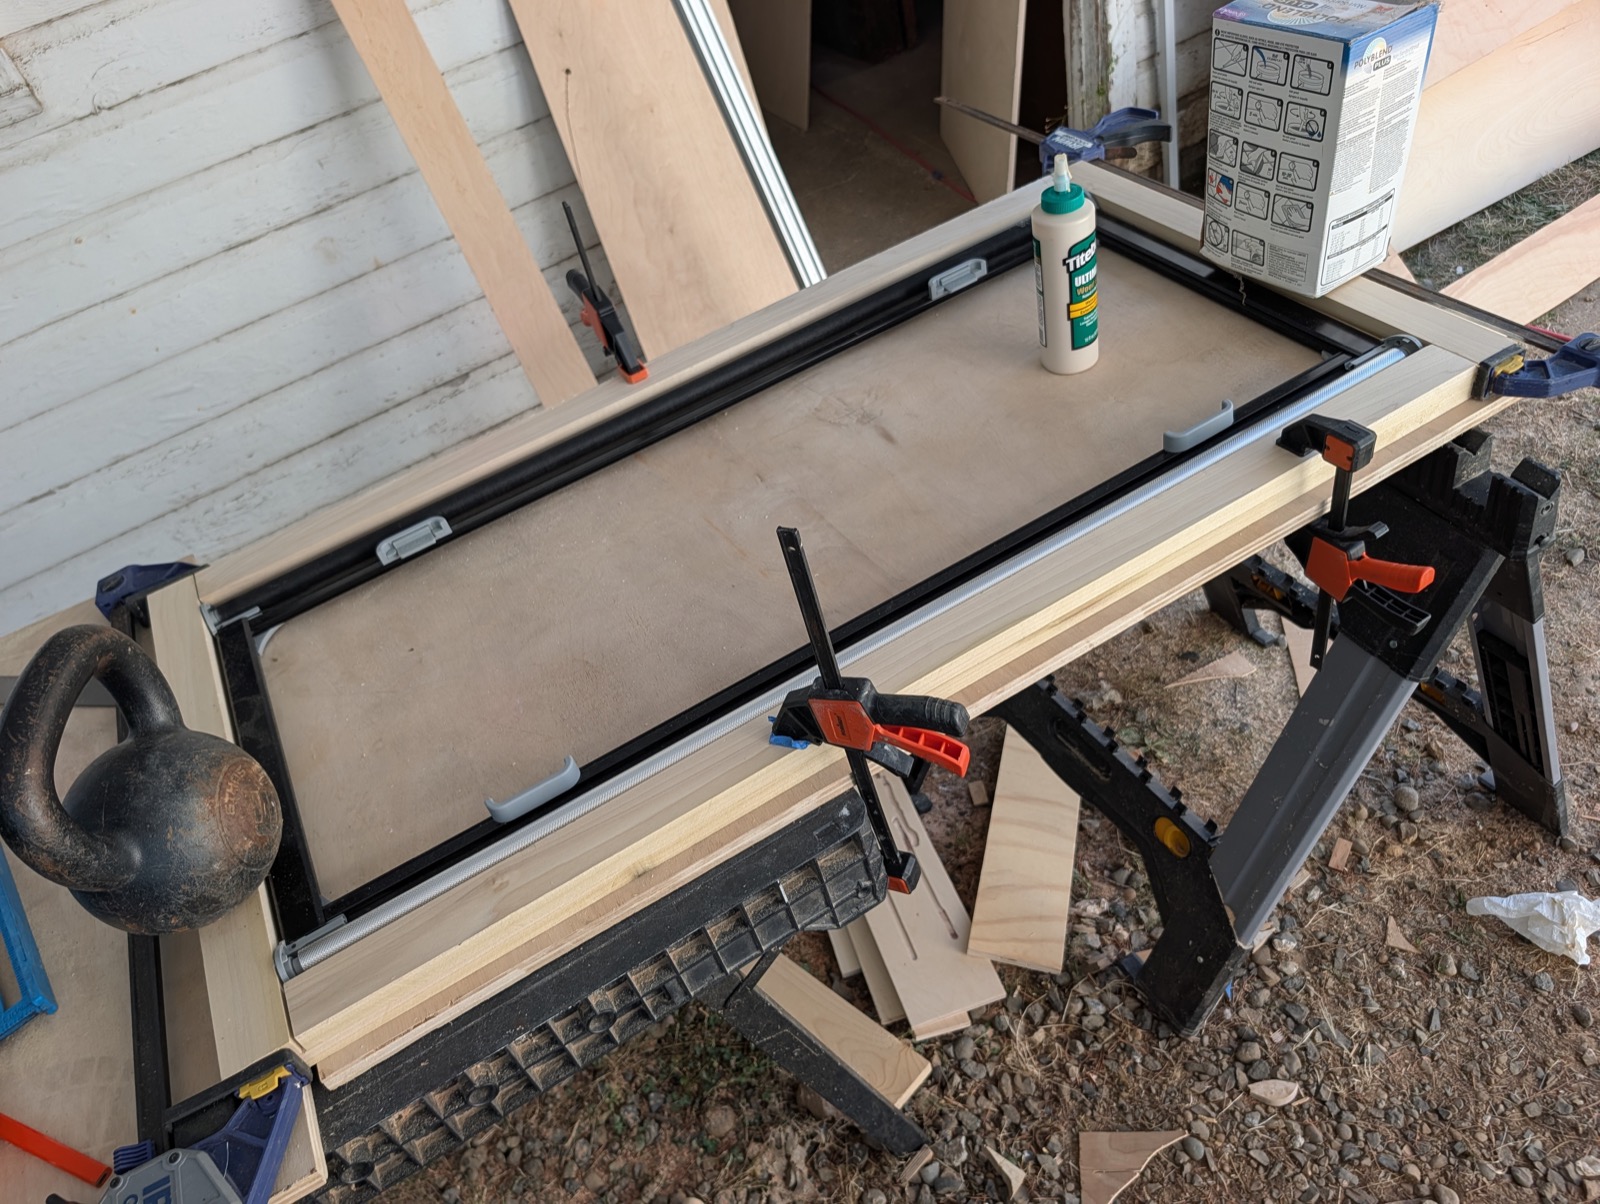
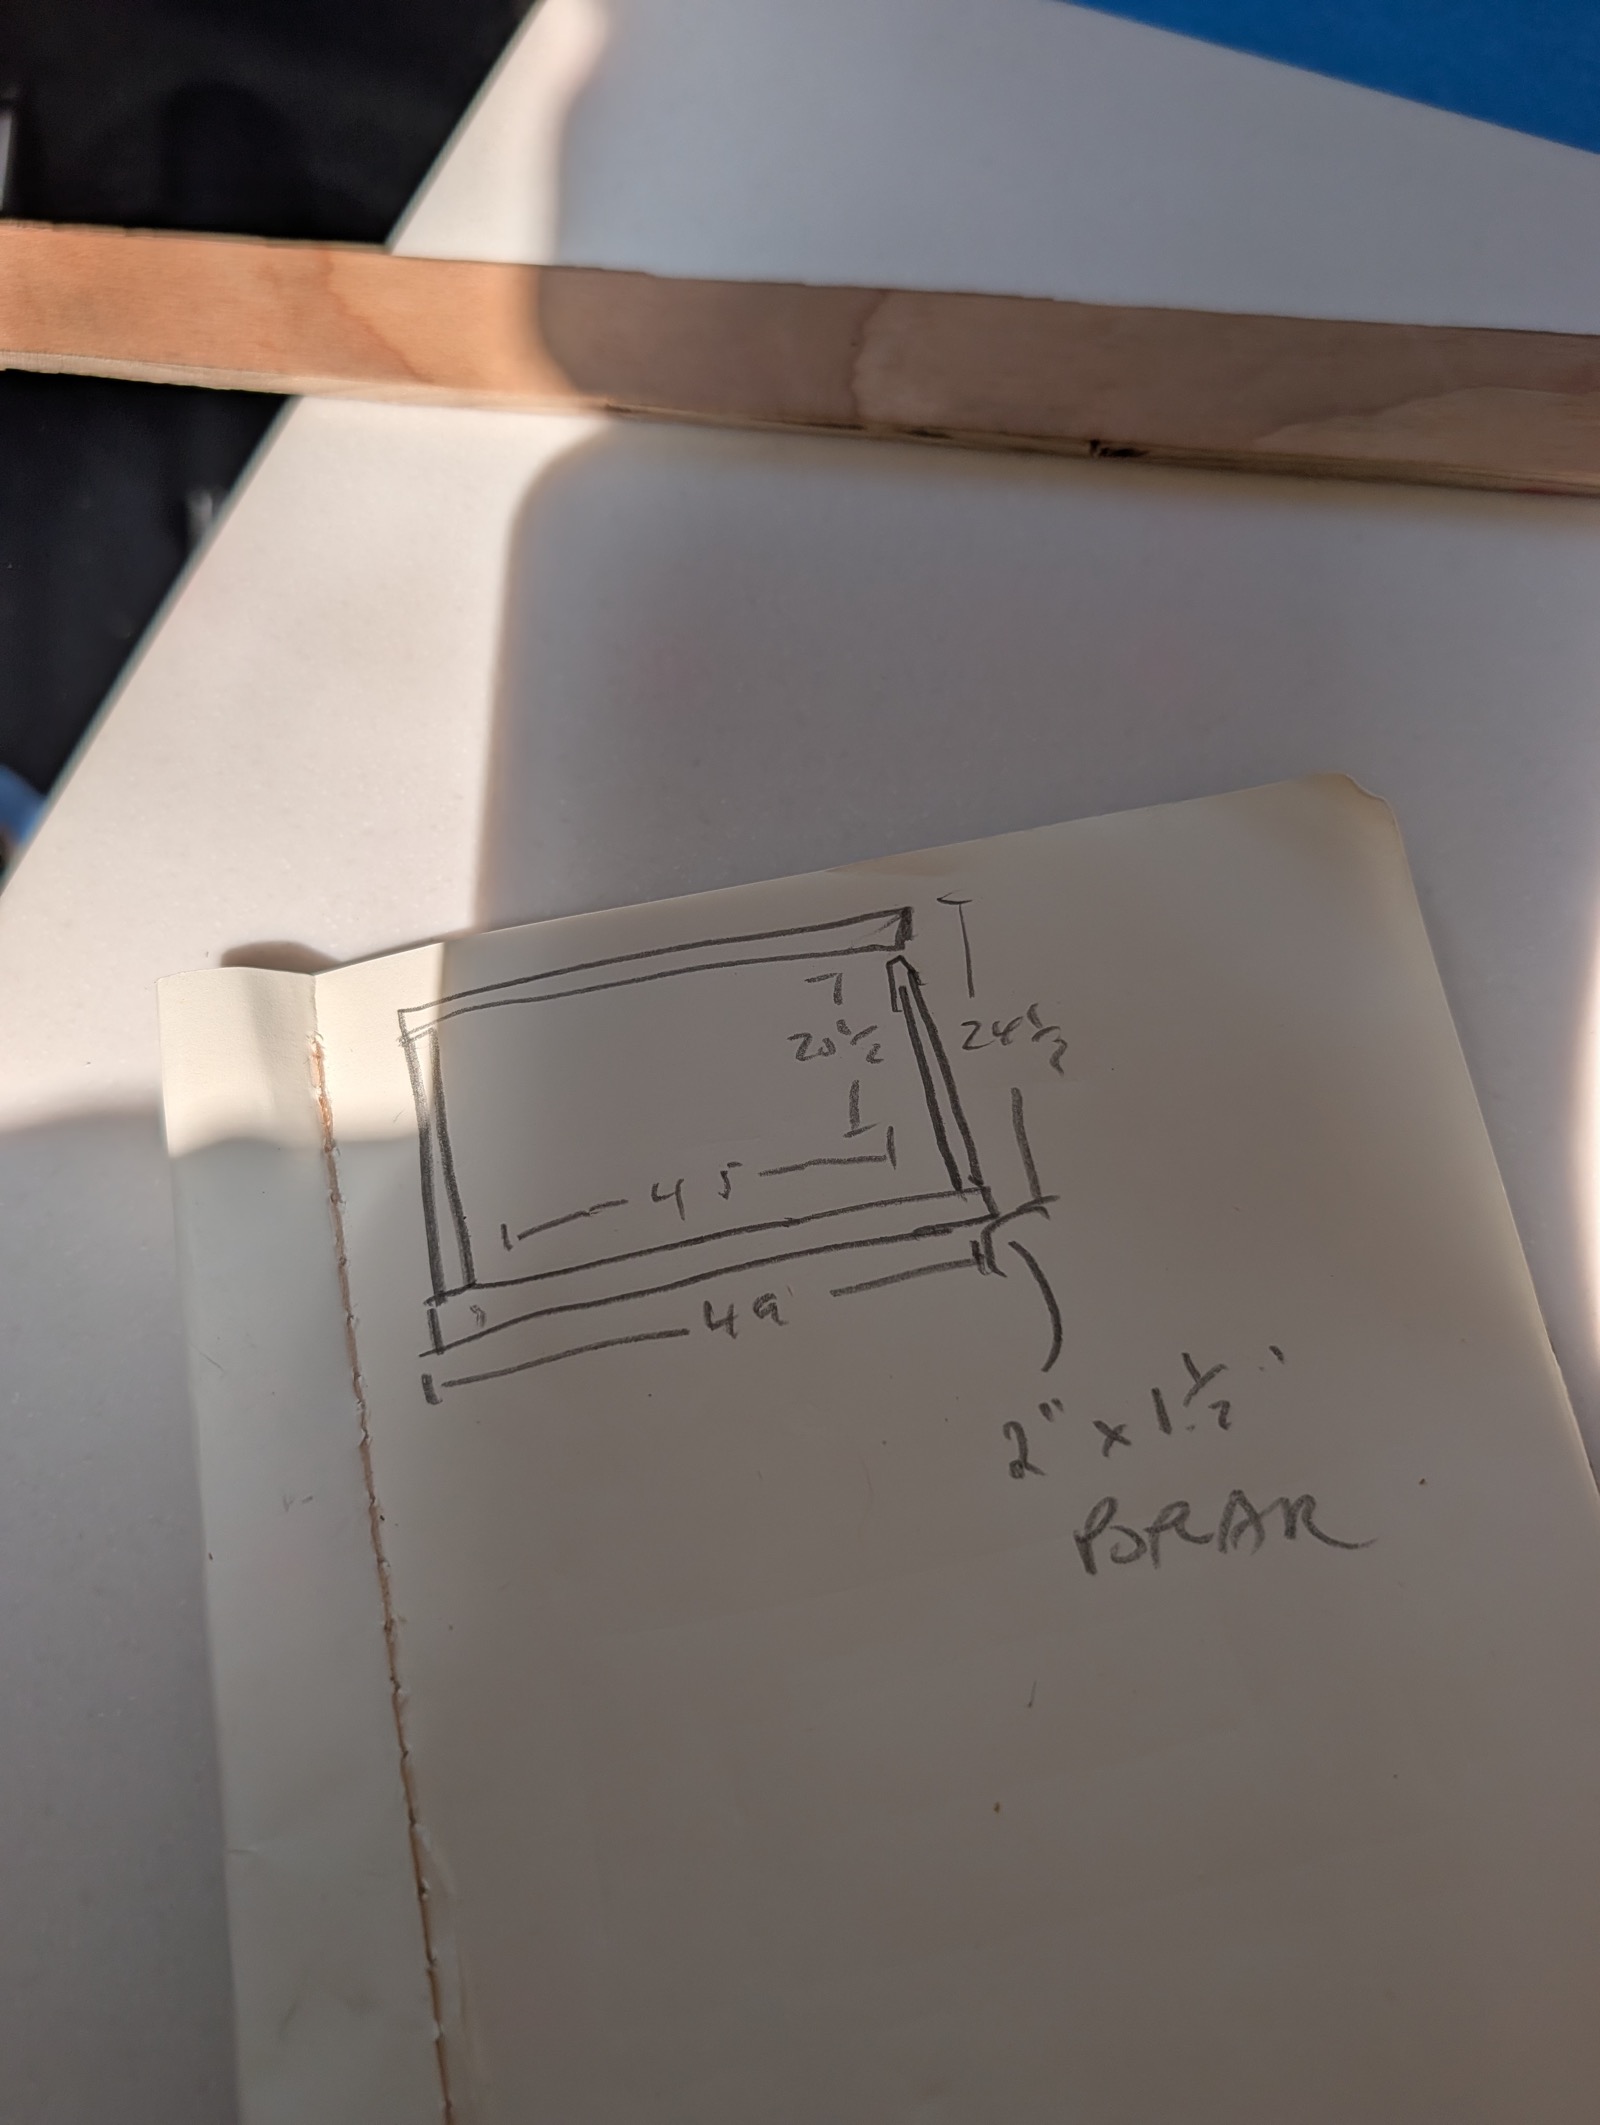
The glue-up, off the notebook: frame outer 49" x 24 1/2", opening 45" x 20 1/2", rails 2" x 1.5". Two layers of 3/4" poplar with the long members staggered, so every corner locks as a half-lap with face-grain glue and nothing screwed. Square by the diagonals, clamp flat overnight, rout the groove after.
4The numbers
5What to buy
430 stainless, not 304 or 316. The stainless specified everywhere else on this truck for the salt air is non-magnetic, and a keeper made of it is a decorative piece of metal.
6Taking it off
- Cut the caulk. The backsplash comes away.
- Swing the bottom out. The magnets break in shear, about a fifth of their rated pull.
- Lower it out of the bracket. Nothing has bent.
Every step is the panel moving as one stiff object. Rigid-body motion costs the finish nothing; bending is what cracks it.
7Notes
- Magnets never carry the weight. The counter takes it and the bracket steadies the top. All the magnets do is hold the panel flat to the wall.
- You lift them off, not pull them off. Shear is roughly a fifth of rated pull, which is why eight of them still release by hand.
- One groove, 3/4" wide by 1/4" deep. It holds the magnet and the keeper both. No Forstner pockets.
- Every cut is in the rail, never the panel. The rail is 1.5" thick. The panel is 1/4" ply with a brittle finish on the far face.
- Keeper narrower than the groove. 1/2" in a 3/4" groove leaves 1/8" a side to locate the panel. Same width and it jams.
- The U-bracket is aluminium, and aluminium is not magnetic. Any magnet up there would need steel or wood to land on.
- Keepers are 430 stainless. 304 and 316 are not magnetic. This is the one place on the build where you buy the lesser stainless on purpose.
- Laminate the rail from two pieces of 3/4" poplar. The 1.5" is set by the blind so it cannot just get thinner, and a ripped 2x4 bows as it leaves the blade.
- Seal the panel's bottom edge on the bench. It stands on the counter inside a pocket that cannot dry, and raw ply end grain wicks.
- Wrap or trim the cutout edge. A bare microcement arris at the window reveal is the first thing to chip.
8The edges: trim, sealing and what holds it flat
Jeff's scheme, 2026-09-01. The panel is still held the way section 1 says, counter takes the weight and the top bracket steadies it. What follows is how the four edges close and what stops the panel drumming.
| Edge | Meets | How it closes |
|---|---|---|
| Top | counter run and upper cabinets | black anodised aluminium trim, bedded in sealant |
| One side | the Happijac | trim carried round, bedded in sealant. This is joint E4 |
| Other side | the microcement wall to the shower | sealant in the seam, no trim |
| Bottom | the counter | sealant bead |
| Window reveal | the blind frame, which is metal | sealant down the two sides only |
Holding it flat: light double-sided tape rather than magnets, onto the frame behind. This is a change from the magnet scheme drawn in section 1 and it is a fair one, because nothing here is carrying weight. The counter does that. The tape only has to stop the panel flapping, and it wants to come off again without a fight.
Do not use permanent foam mounting tape for this. Pulling it off a 1/4 in ply panel takes the face veneer with it, and the far face is microcemented, so there is no fixing that. Use a reclosable fastener, hook and loop or 3M Dual Lock, or a stretch-release tape like Command. All three are designed to be opened, and none of them delaminate the panel on the way out.
Silicone is the wrong choice for one of those five joints. Nothing sticks to cured silicone, not paint, not microcement, not more silicone. Four of the joints above are trim or counter lines that will never be coated, and silicone is fine there. The microcement-to-microcement seam to the shower wall is the exception: that is the one joint you might one day want to skim, touch up or re-coat, and a bead of silicone in it forecloses that permanently. Use an MS polymer there instead, which stays flexible, bonds better to cement, and can be coated over.
Wherever a bead does go in, it must be neutral cure. Acetoxy silicone, the vinegar-smelling kind, corrodes aluminium and does not bond to cementitious surfaces, and this scheme has it meeting anodised trim, the Happijac and a metal blind frame.
One thing to resolve on site: the notes say "left" for both the Happijac side and the shower wall side. They are opposite edges of the panel. Confirm which is which before any trim is cut, since the trim only runs on one of them.
9Still open
- The groove vs the keeper bar, and this one blocks the rout. The bar bought is 3/4" wide x 1/8" thick; the spec is a 3/4" groove with a 1/2" keeper at 1/16". A full-width bar jams, and 1/8" thick breaks the depth stack (3/16 + 1/8 = 5/16, not 1/4). Proposed fix: rout 1" wide x 5/16" deep instead. Not yet decided, and it must be before the router runs.
- The left/right margin split of the cutout: the sketch gives 14 1/4" total, the drawings assume centered.
- How deep the U-bracket is.
- Whether the groove clashes with the blind pocket, since both are cut into the same 1.5" of rail.
- The two lounge window panels, which have no measurements at all yet.
Build photos
10Build log
HARDWARE RUN, Home Depot, $89.86, and the panel's remaining parts are mostly in hand: keeper steel (48 x 3/4 x 1/8 flat bar), five lines of #10 screws including the FLAT heads the magnets need, a black 3/8 aluminum tile edge profile that reads as a trim-language candidate, matte black hinges, and the microcement applicators, which means finish work is close. One conflict caught on arrival: the keeper bar is 3/4 wide and the groove is 3/4 wide. The spec said keeper NARROWER than the groove, 1/2 in a 3/4, for locate tolerance; a full-width bar jams. Either the groove goes to 1 wide (one more router pass) or the keeper gets narrower stock. The 1/8 thickness is also double the 1/16 the stack assumed, so the groove depth check runs again before routing: 3/16 magnet + 1/8 keeper = 5/16, not 1/4.
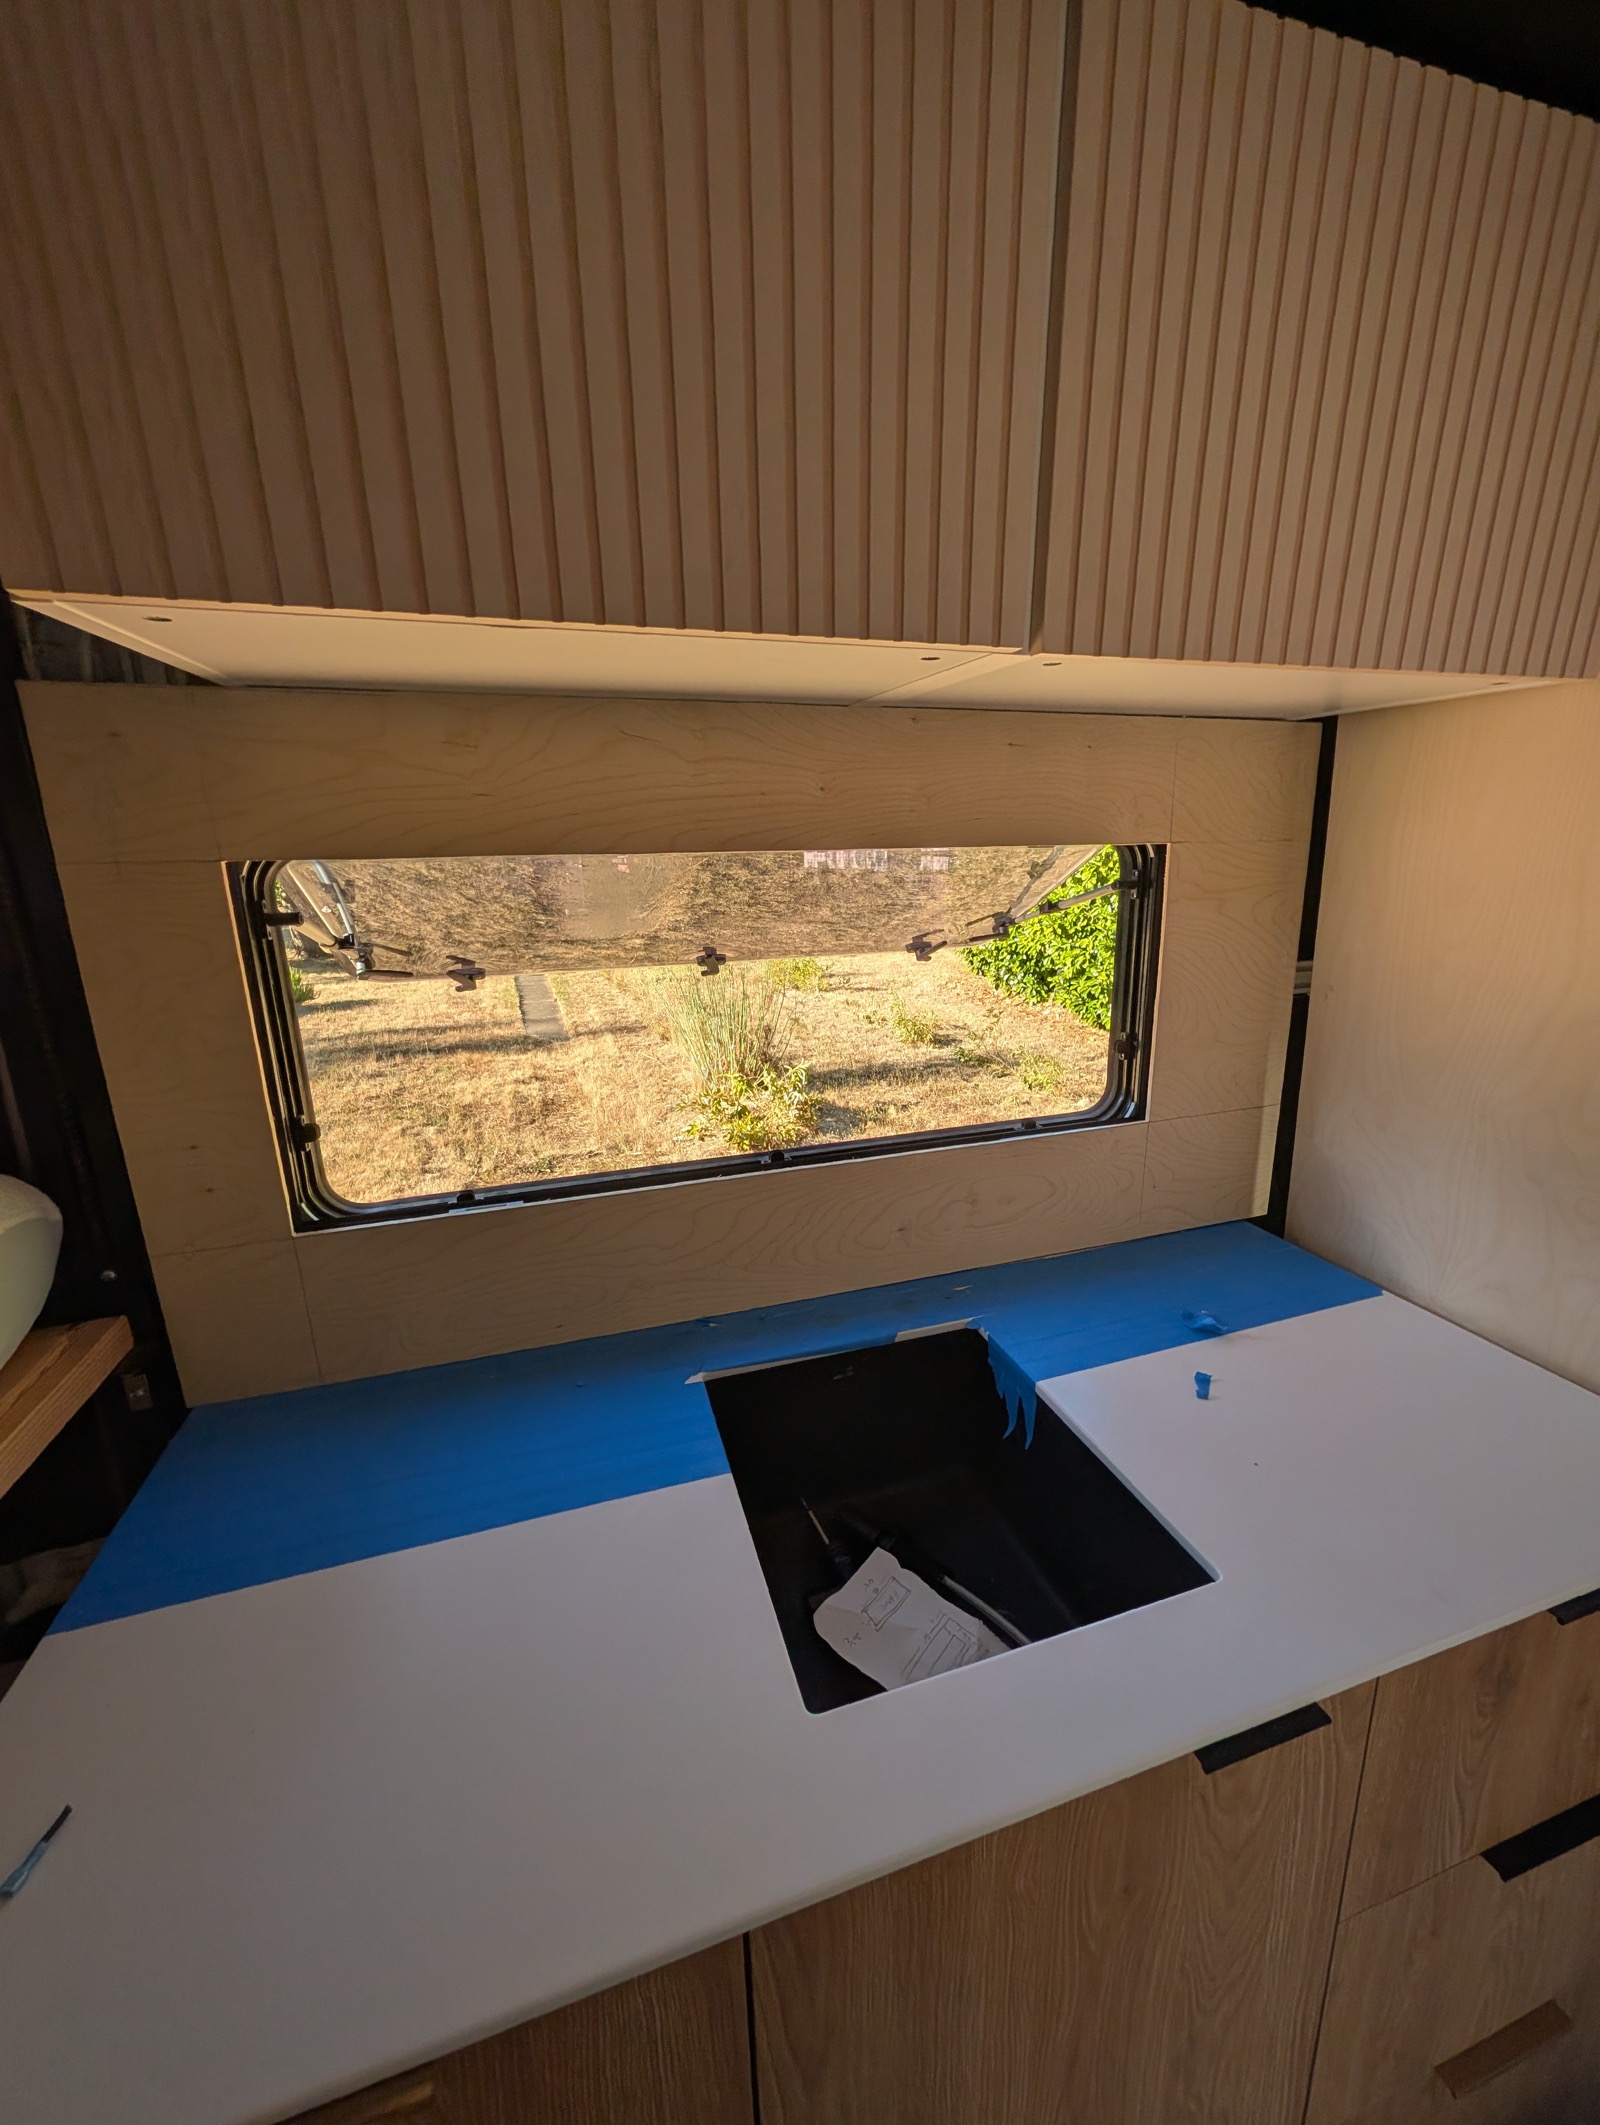
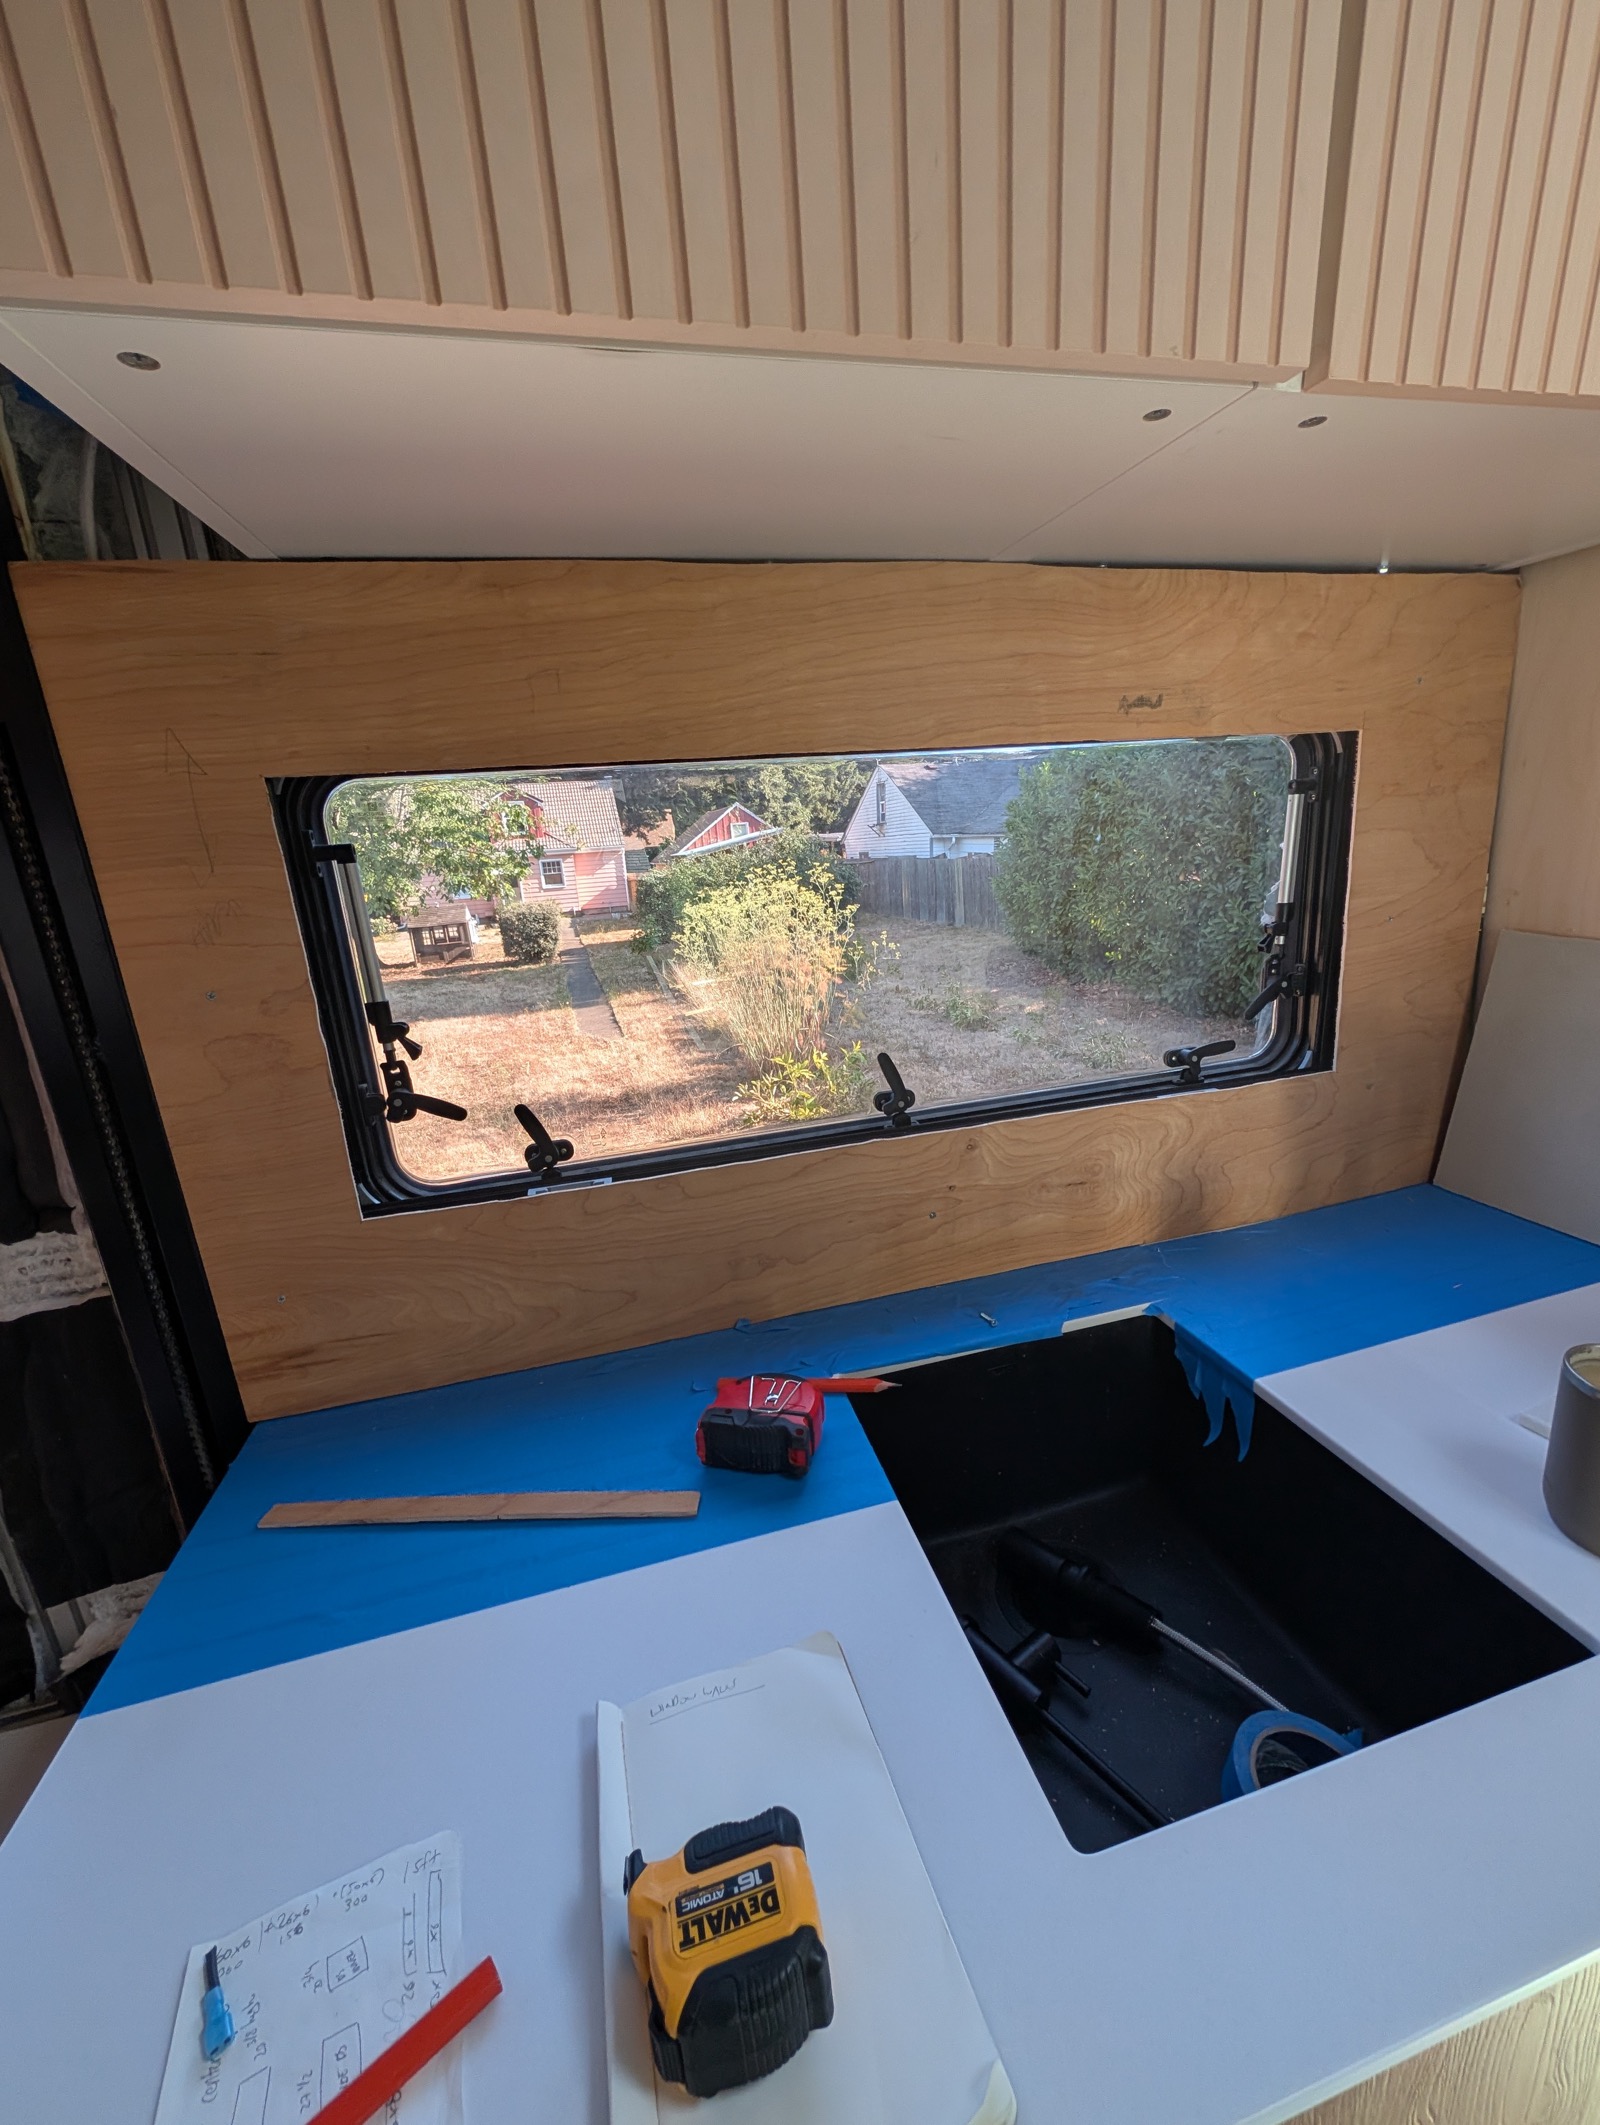
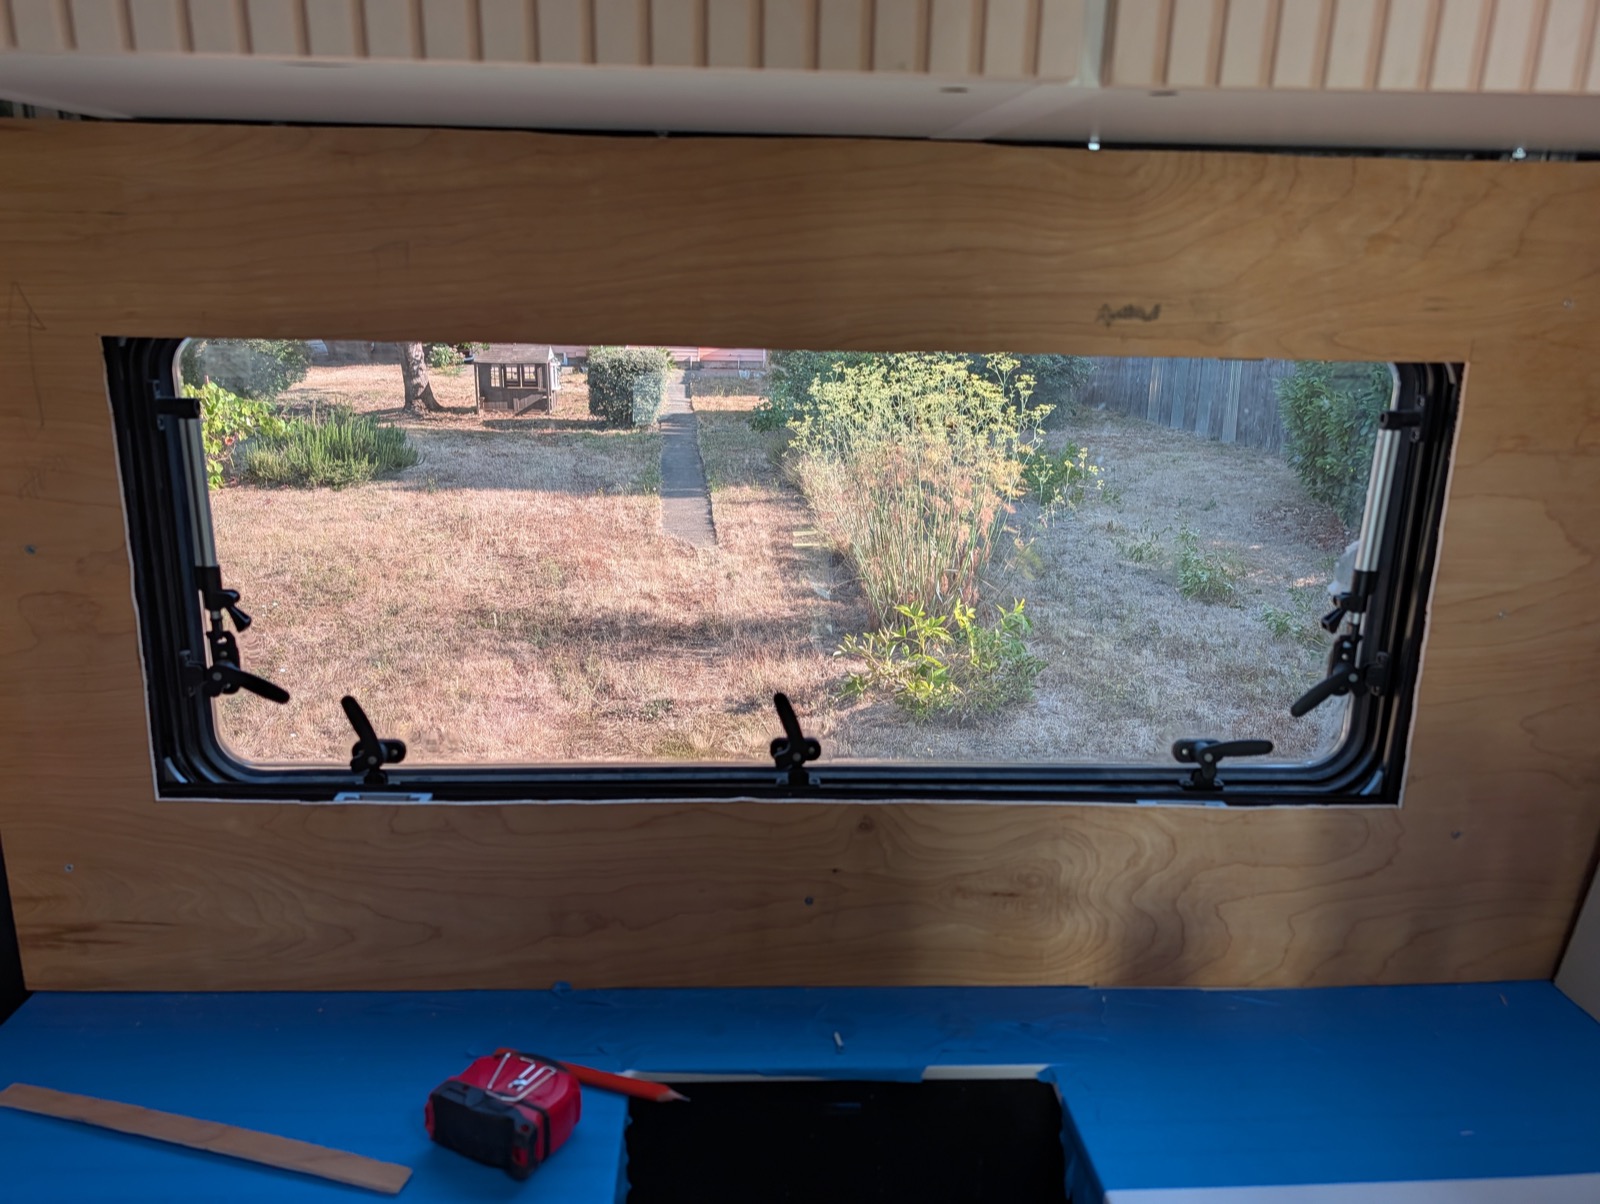
THE REAL PANEL IS IN. Cutout made against the template, panel standing in its final home between counter and uppers, window cranked open through it, evening light doing the rest. One day, notebook to fitted: template cut and proven, dimensions into the model, blank cut, cutout cut, dry-fit. What it still waits for: the cured rail frame with its groove, keepers on the back, magnets in the cart, seal on the bottom edge, and the microcement that turns it from plywood into a wall.
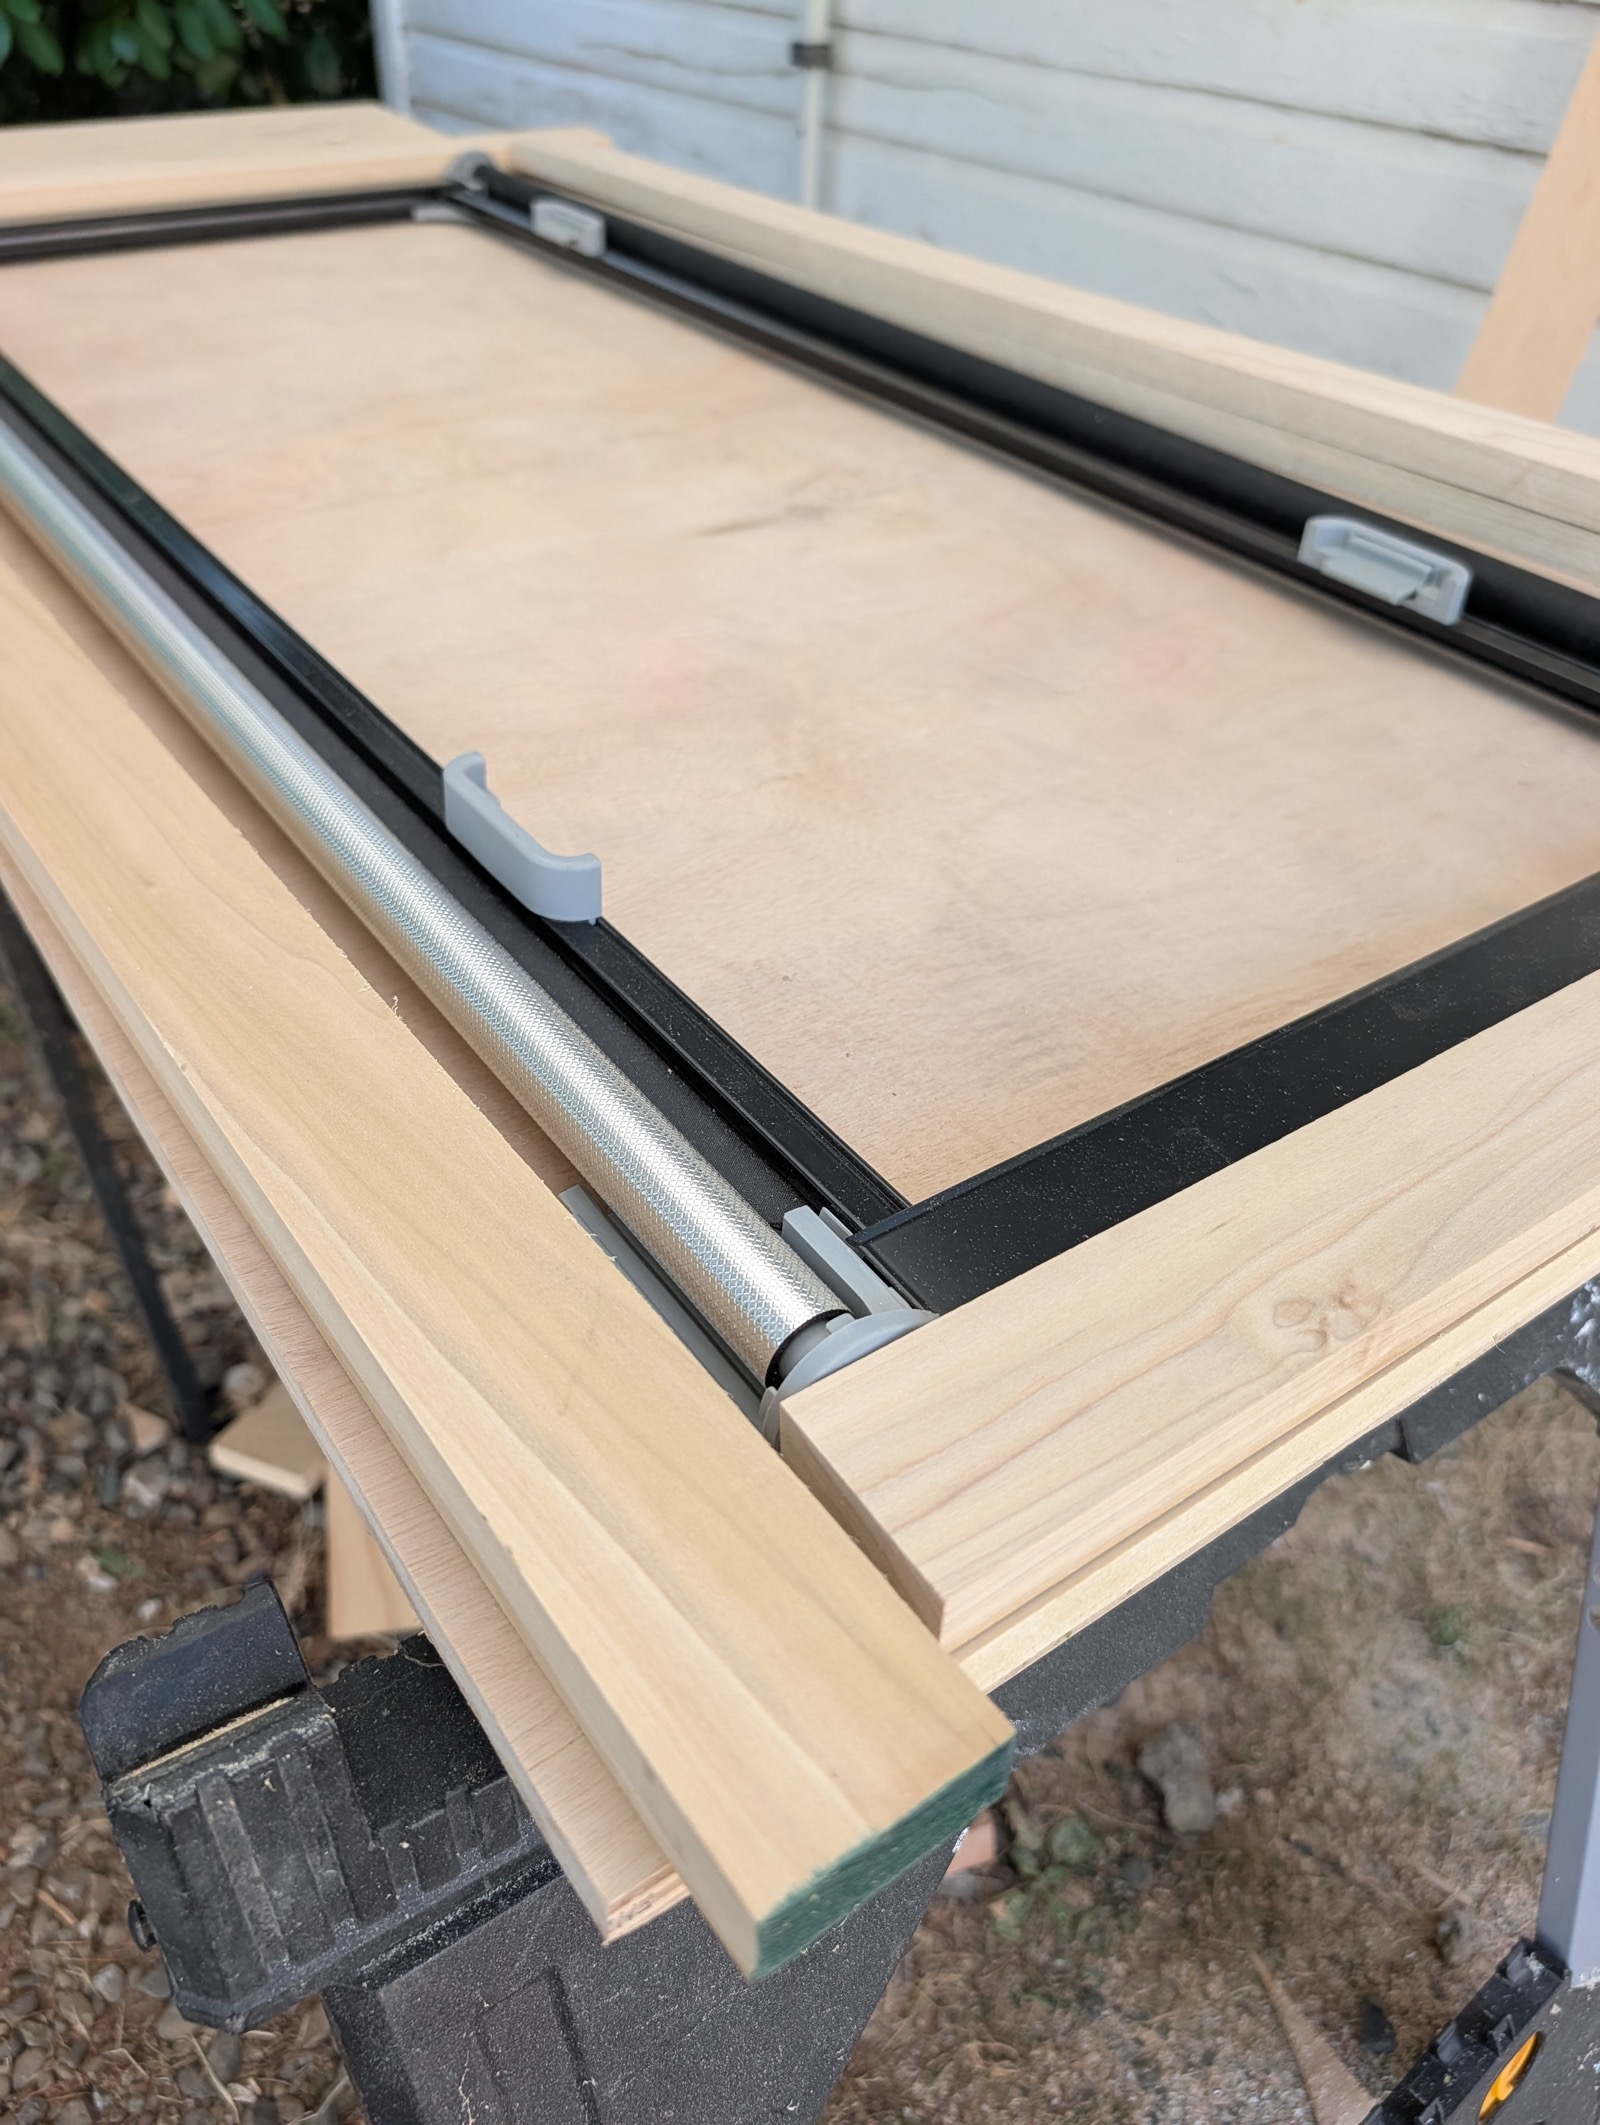
GLUE-UP. Titebond III on, the second layer going down staggered over the first, and the whole thing clamped with everything on site: bar clamps, F-clamps, and a kettlebell earning its keep as a flatness weight. The frame is being glued around the cassette itself, which locks the fit for good, the same template discipline the panel got. Overnight under the clamps; the groove waits for a cured, flat frame.
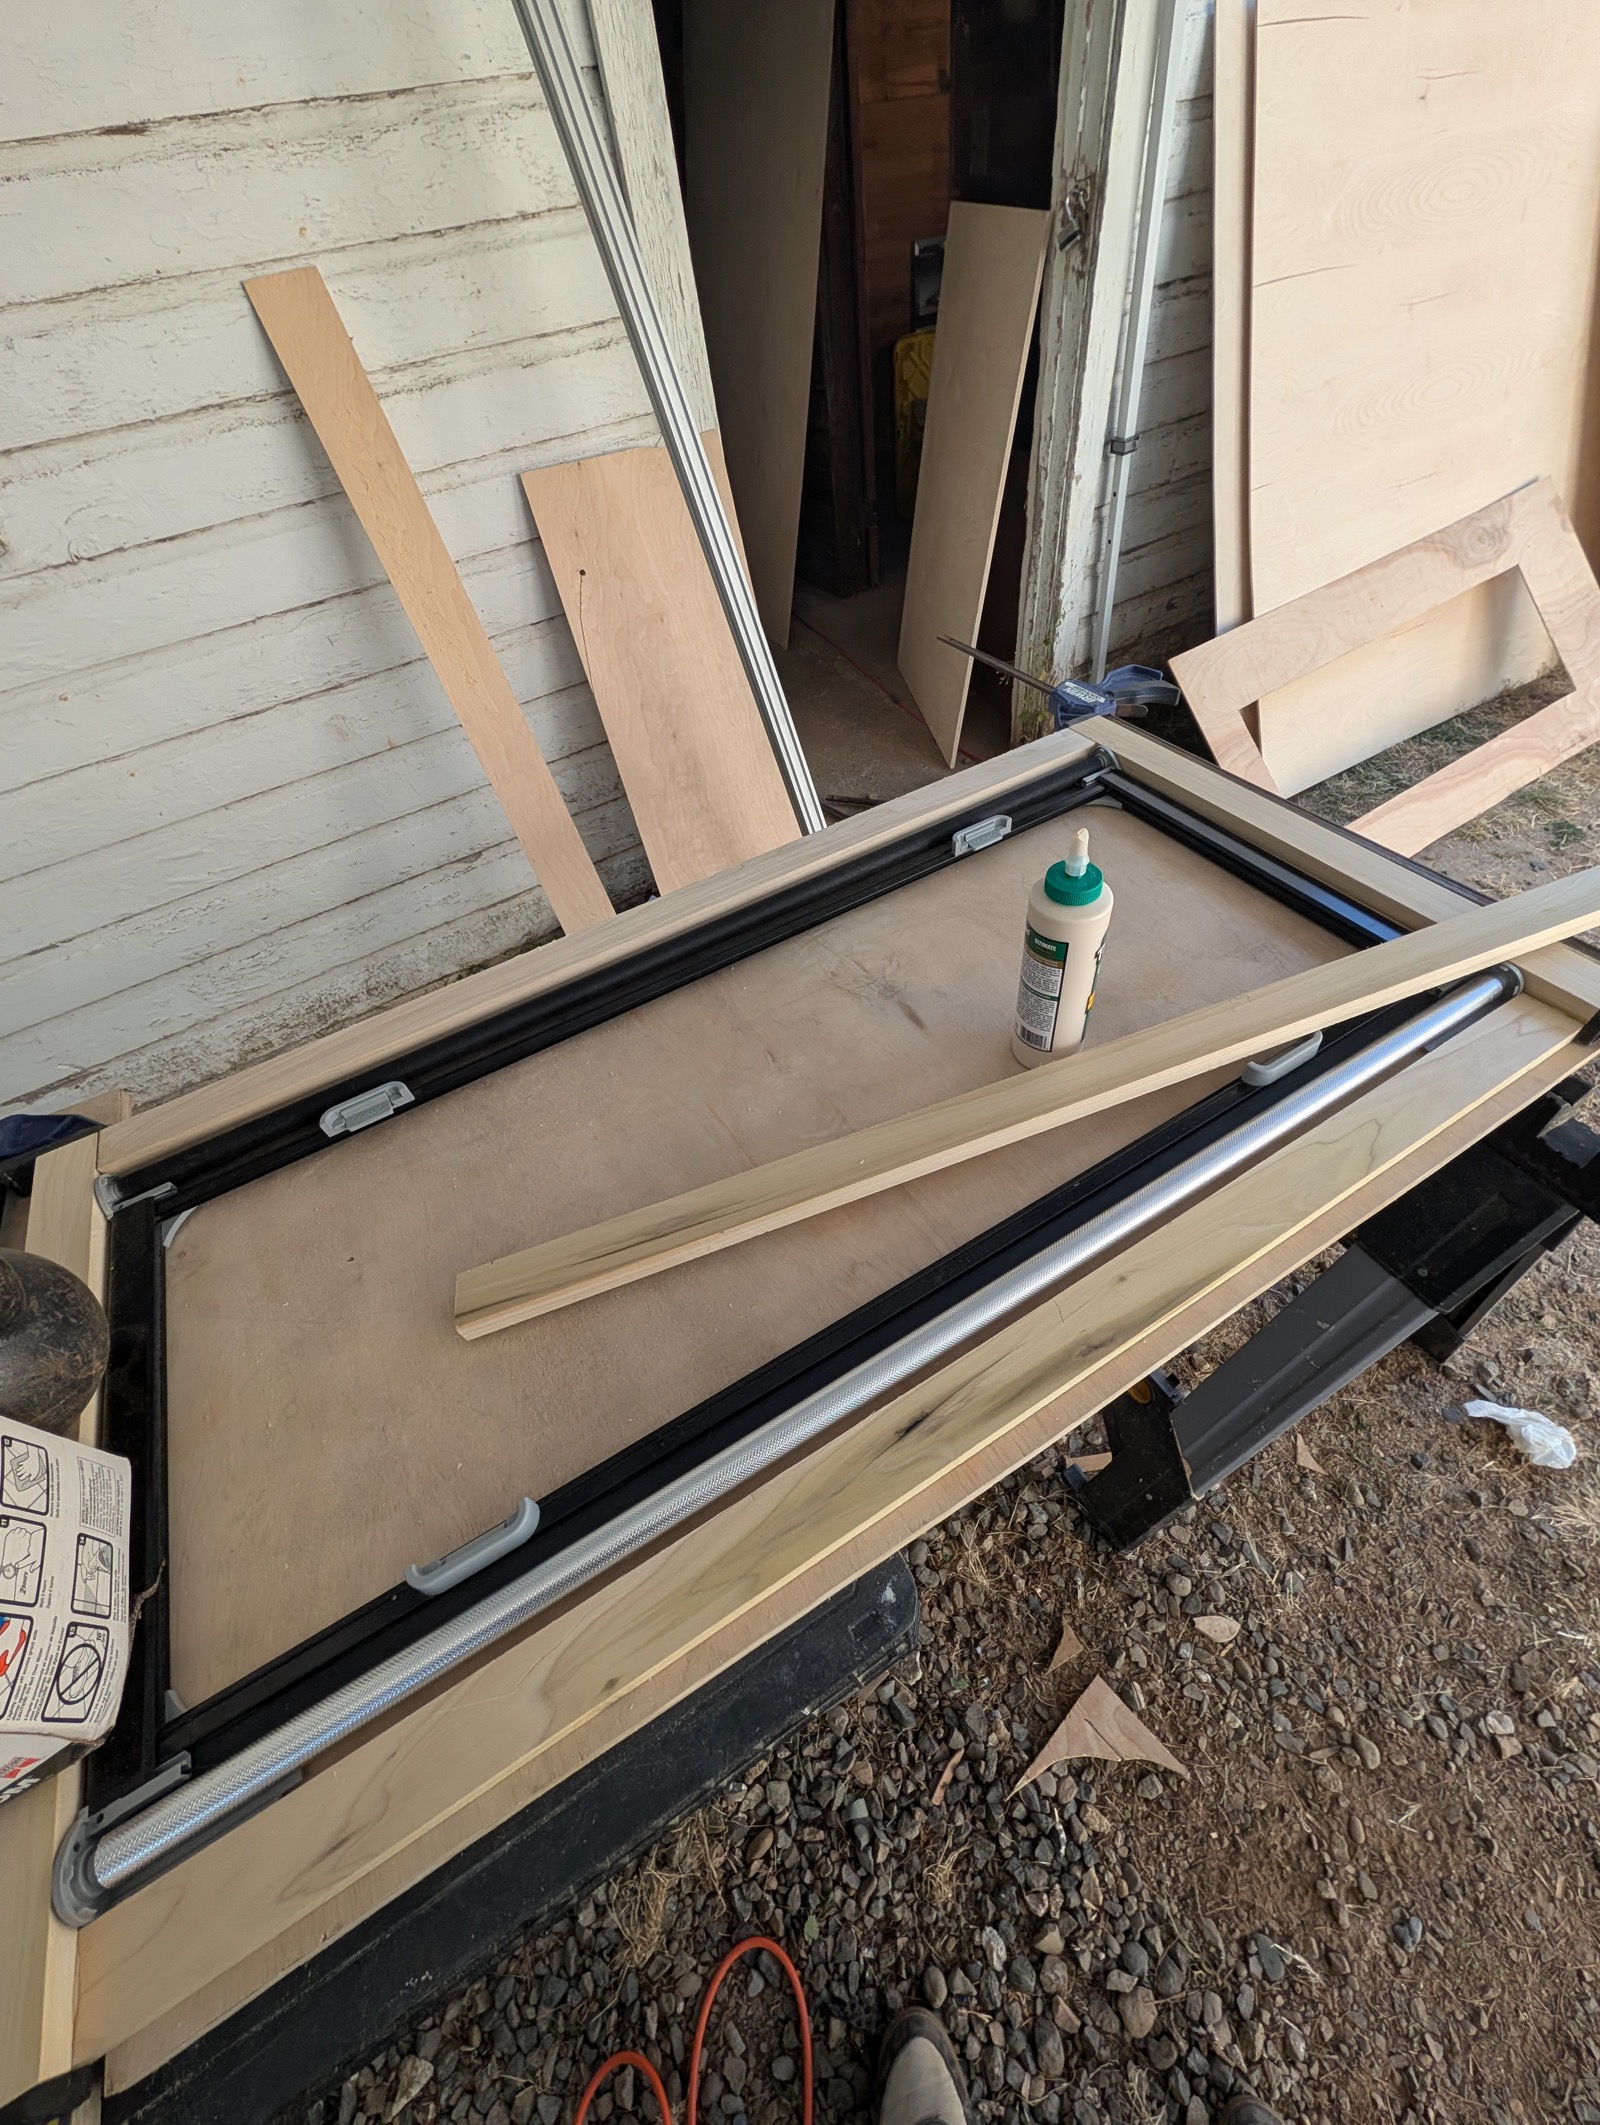
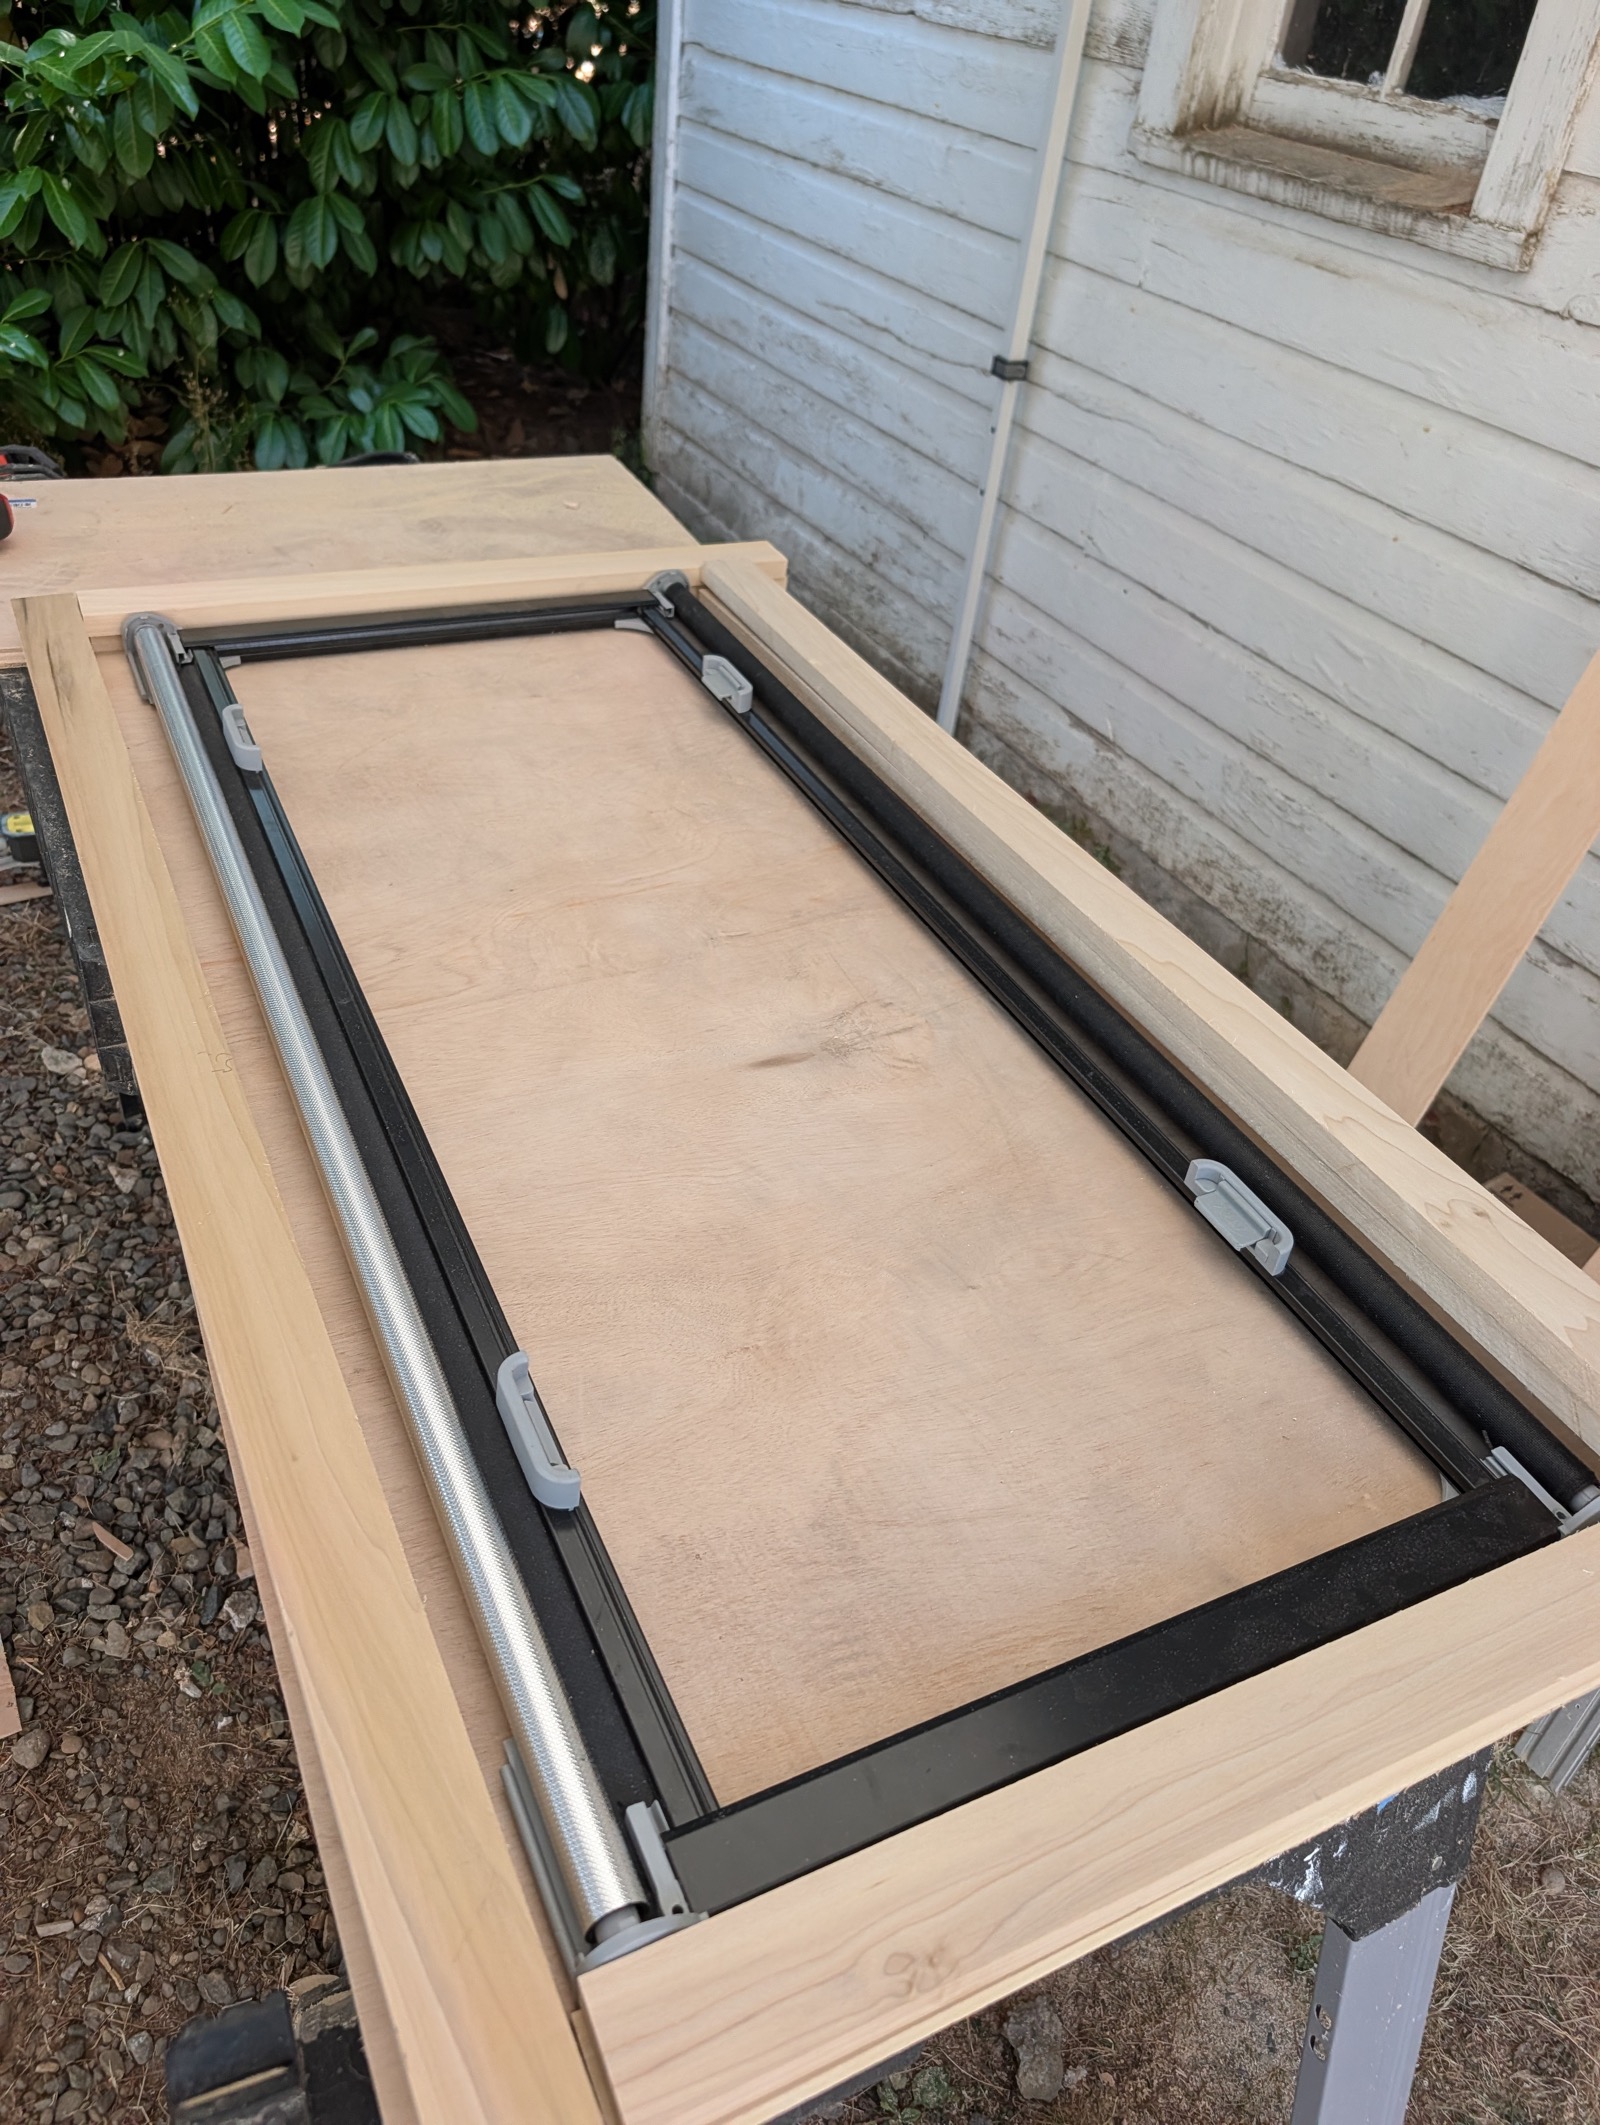
POPLAR RIPPED and the rails DRY-FIT, and the dry fit is being done the right way: around the actual blind cassette, pulled from the window and laid on the bench, not around the notebook numbers. The strips box the cassette with the roller and screen in place, which sizes the opening off the one part that cannot negotiate. The corner laps read clearly in the photos. Next: cut the layer pairs to final length, glue up flat, diagonals before the clamps come on.
RAIL FRAME dimensioned in the notebook and the poplar rip is next: frame outer 49 x 24 1/2, opening 45 x 20 1/2, rails 2 x 1.5. The numbers self-check, since outer minus opening is 4 both ways, two 2 in rails. The frame takes 23 ft 2 in of 2 in strip, well inside the 80 ft the 1x5 poplar yields. Glue-up plan drawn in section 5: two 3/4 layers, long members staggered so every corner locks as a half-lap, squared by diagonals, clamped flat, groove routed after. One relationship worth writing down: the panel cutout (41 3/4 x 15) is smaller than this opening (45 x 20 1/2), so the panel laps past the rail's inner edge and becomes the reveal, and the magnet annulus is the 2 in rail face outboard of it.
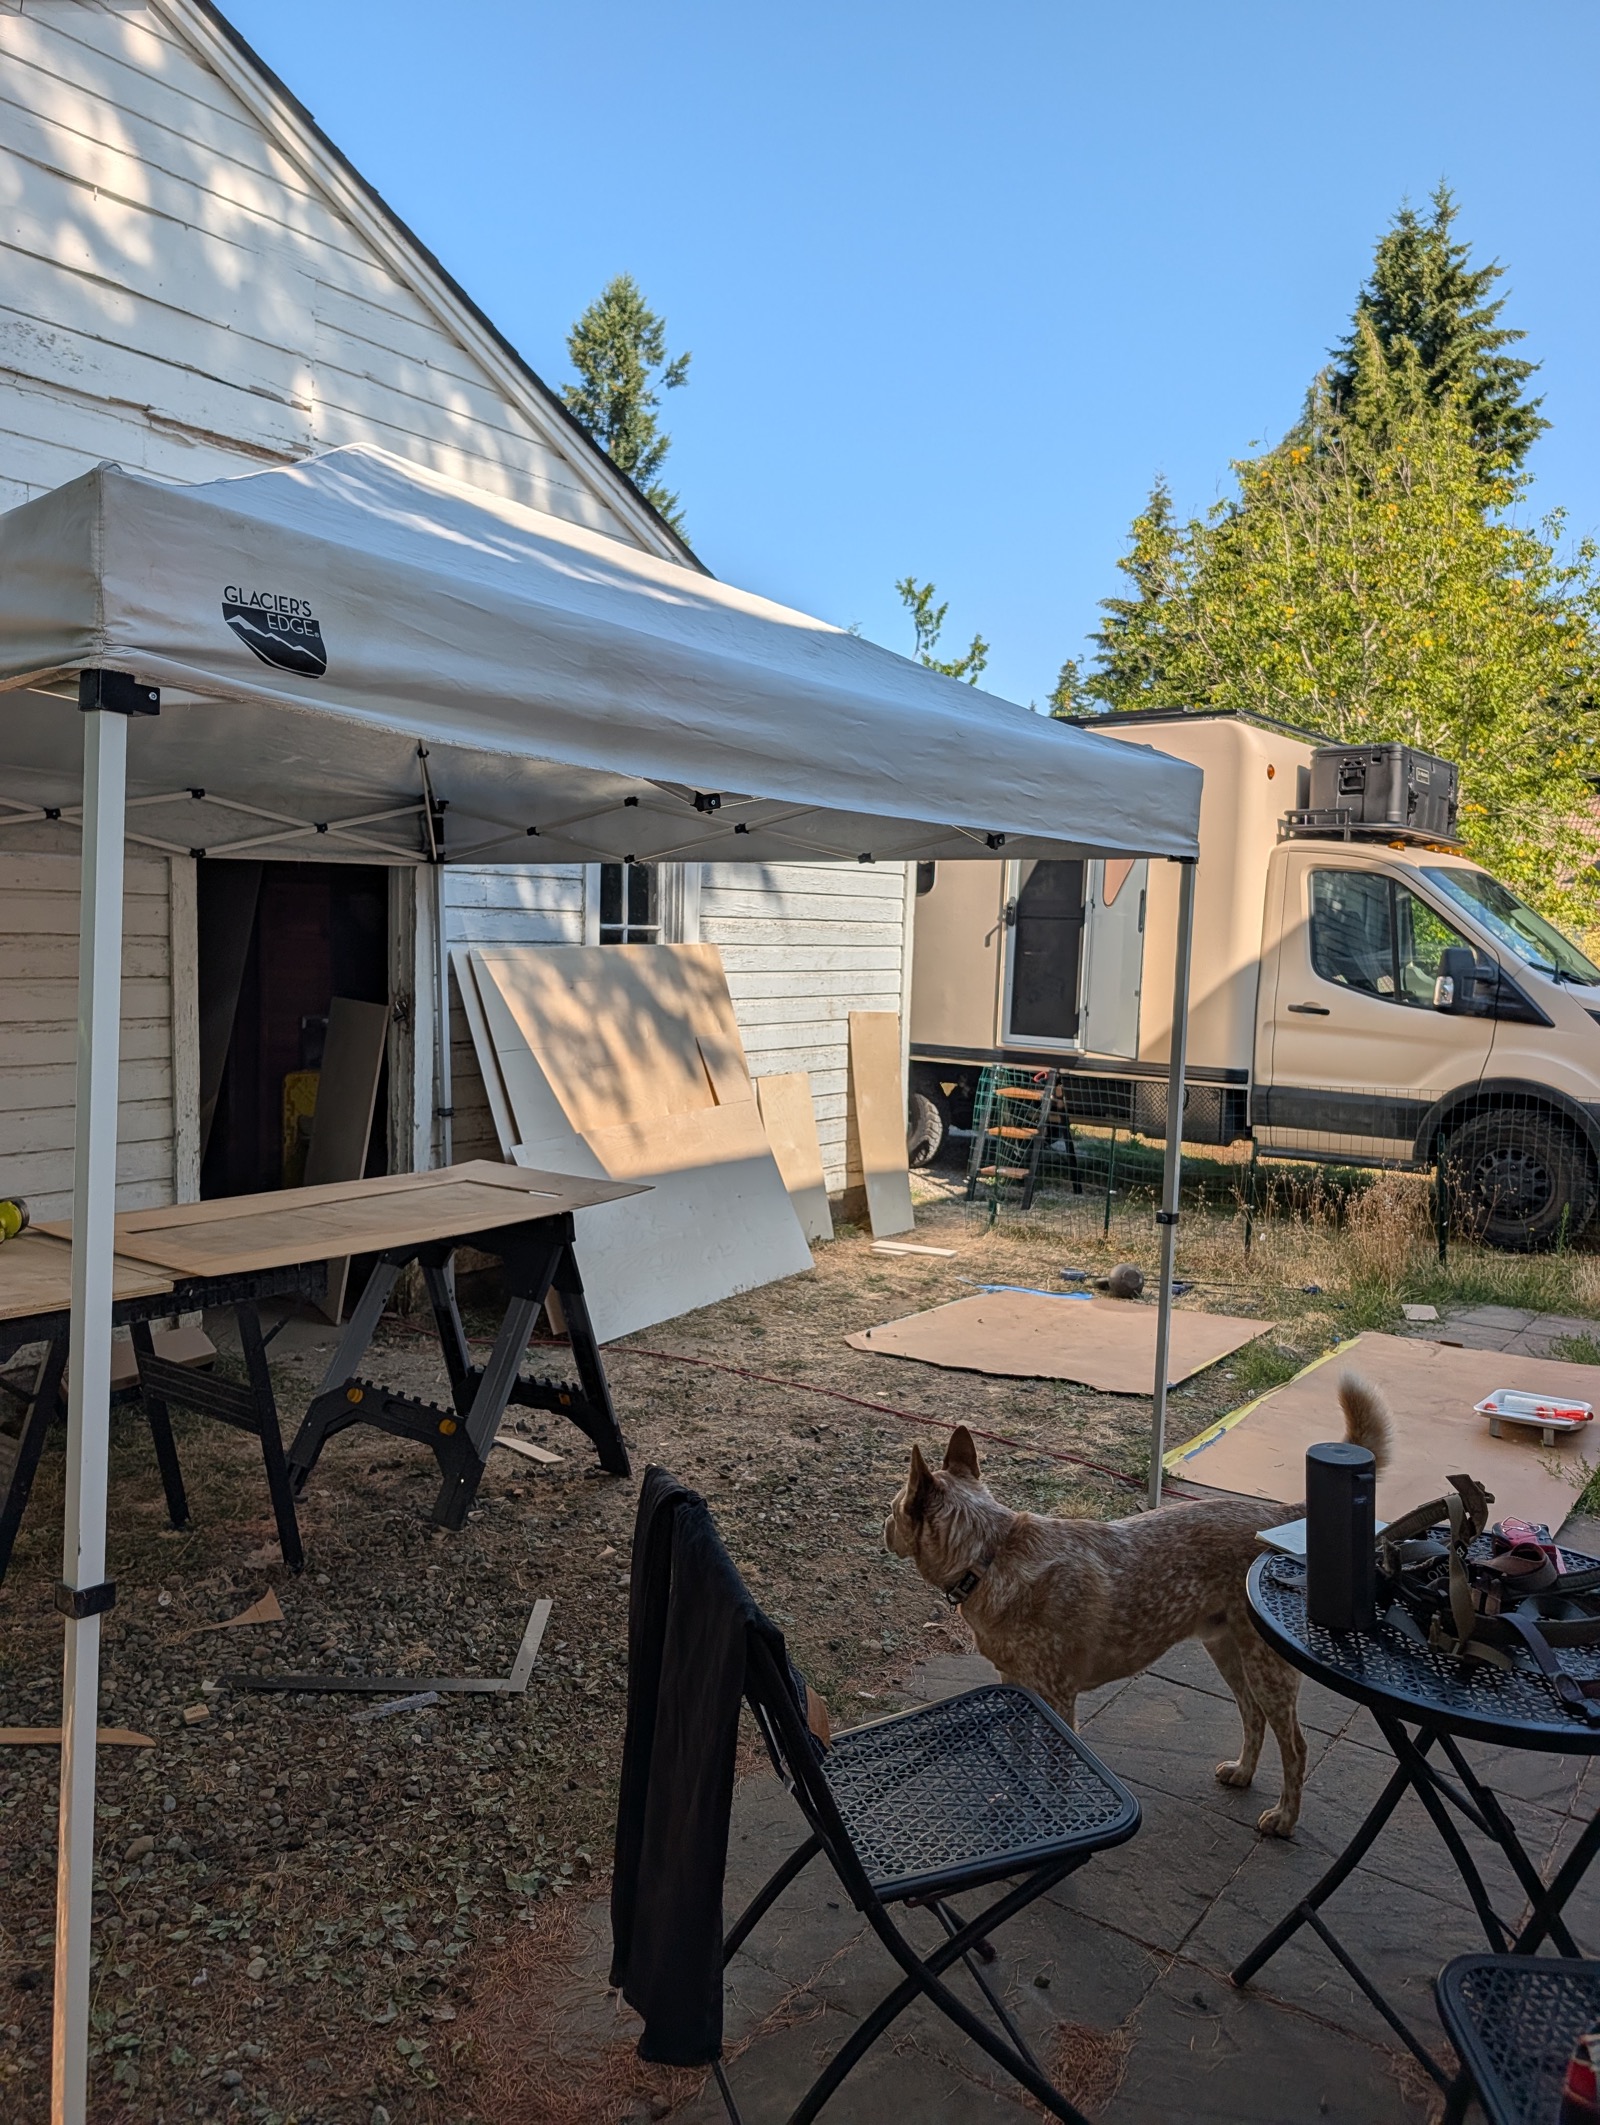
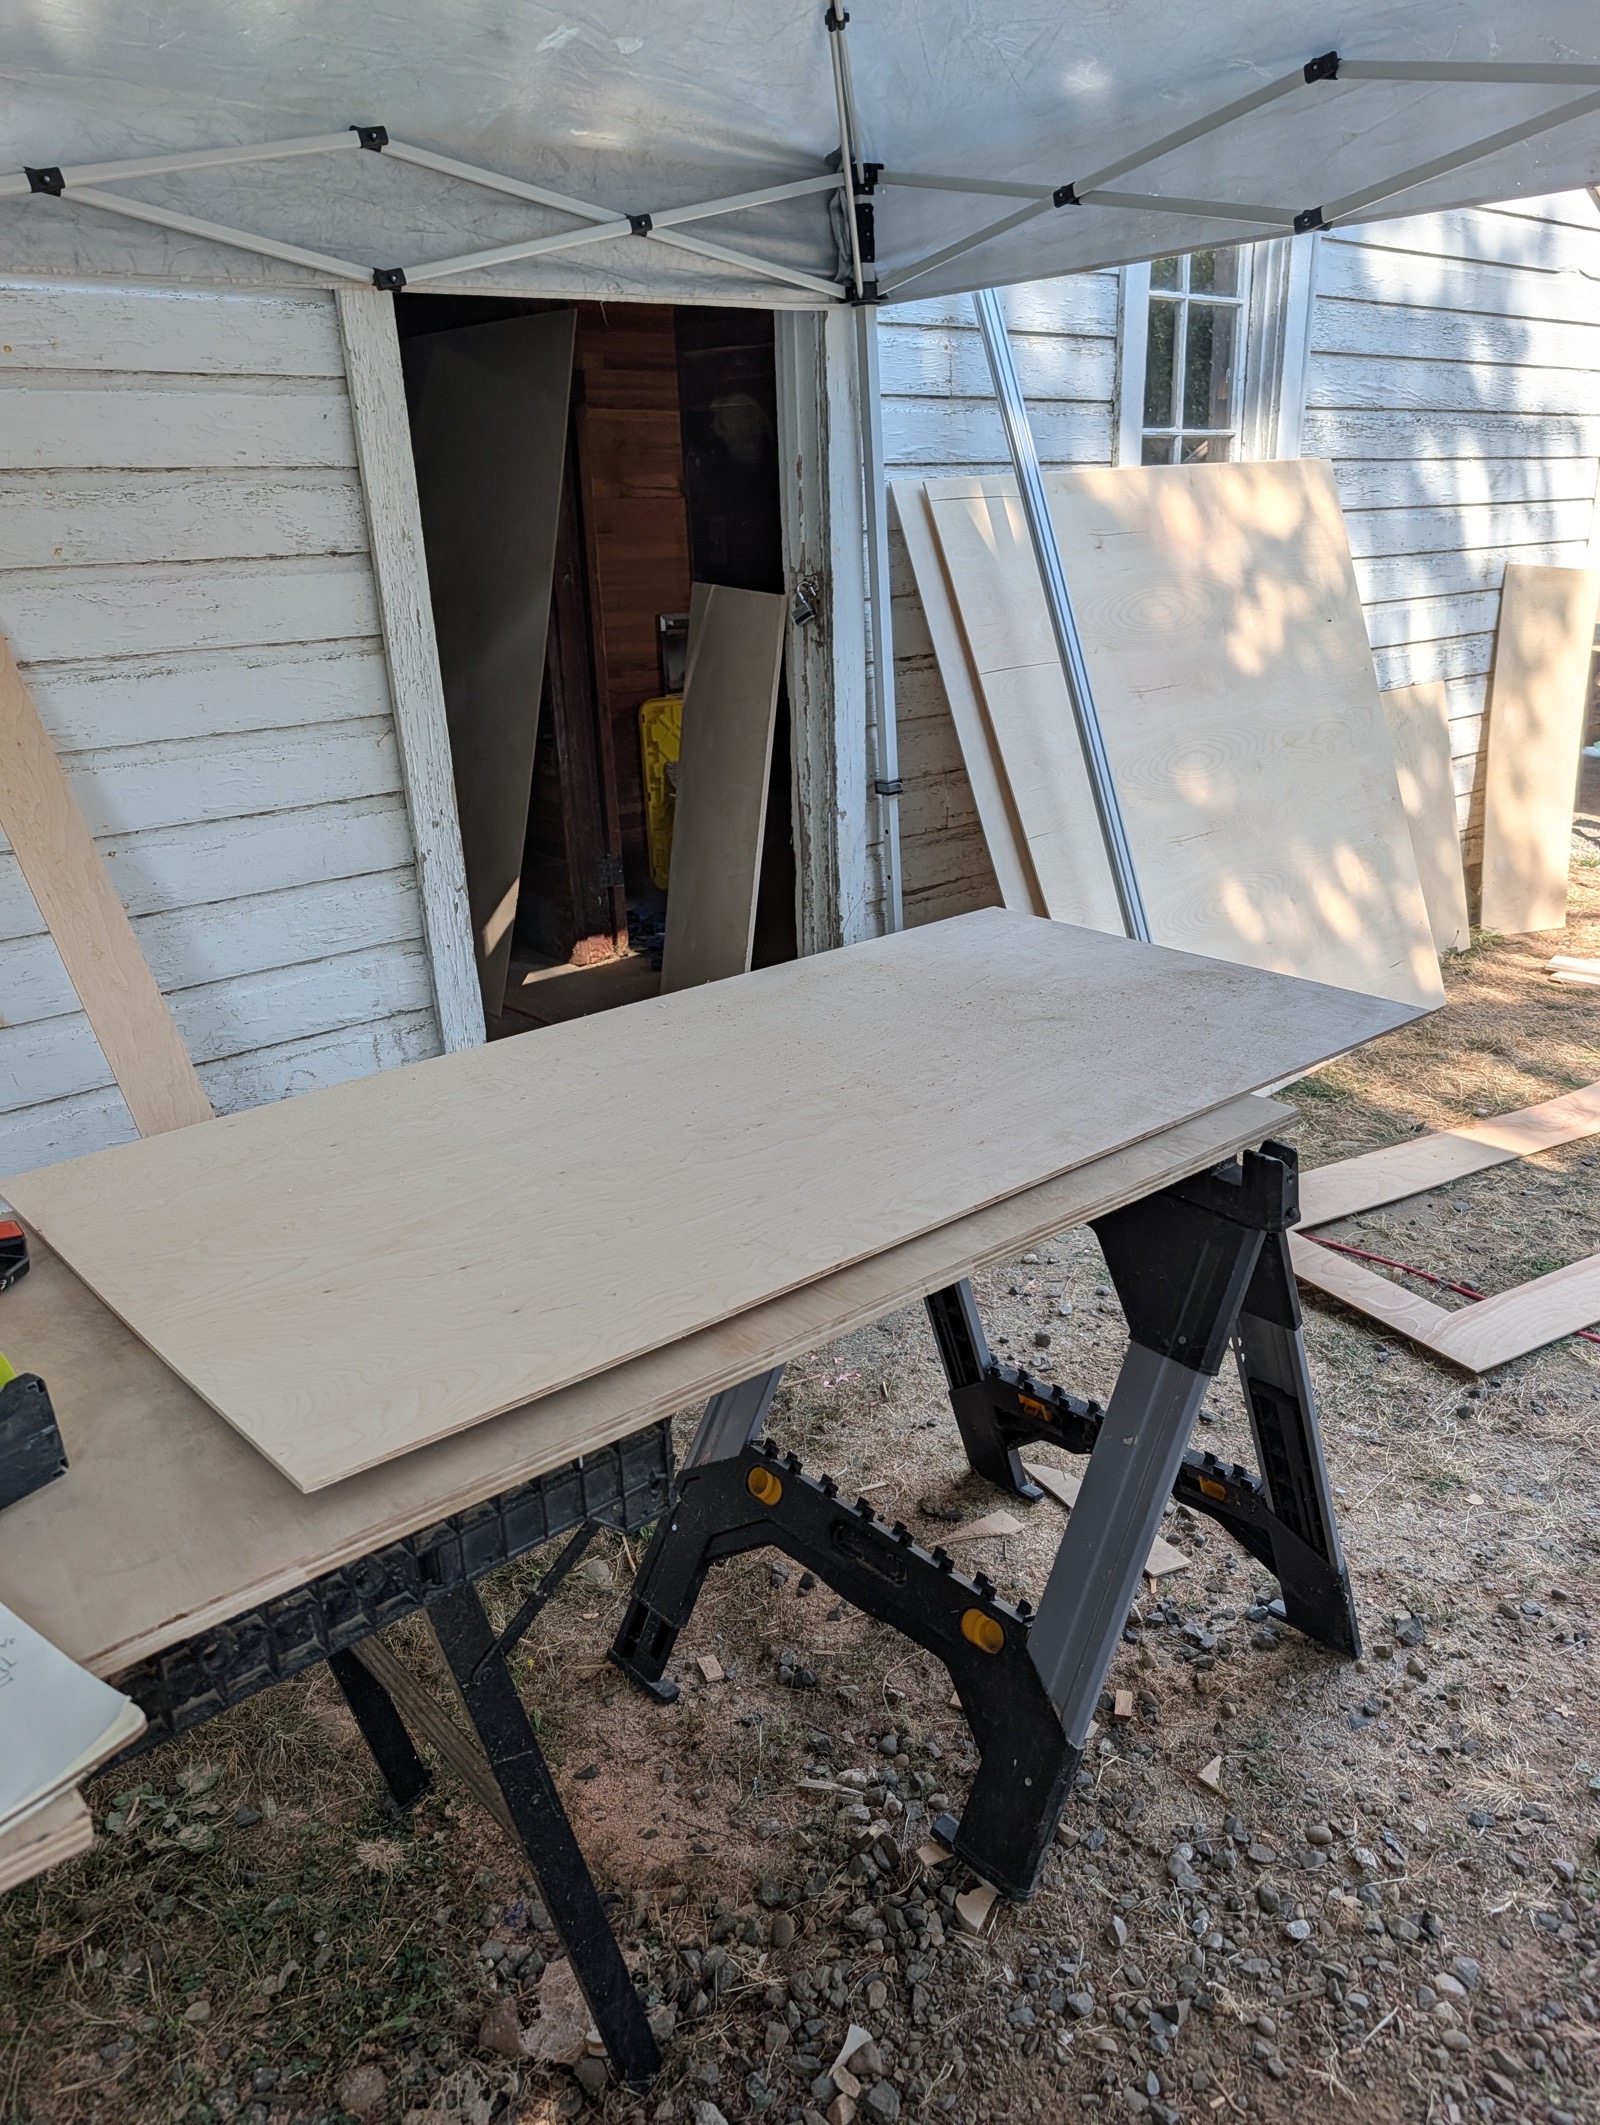
CUT DAY. An outdoor cut station under a canopy: sawhorses, sheet stock staged against the shed, layout squared off the notebook onto the real sheet, and the REAL PANEL BLANK cut to size. The window cutout is the remaining operation: radius the corners first, then connect them, show face managed for tearout. The test template from earlier today is the reference the blank gets finished against, not the notebook numbers directly.
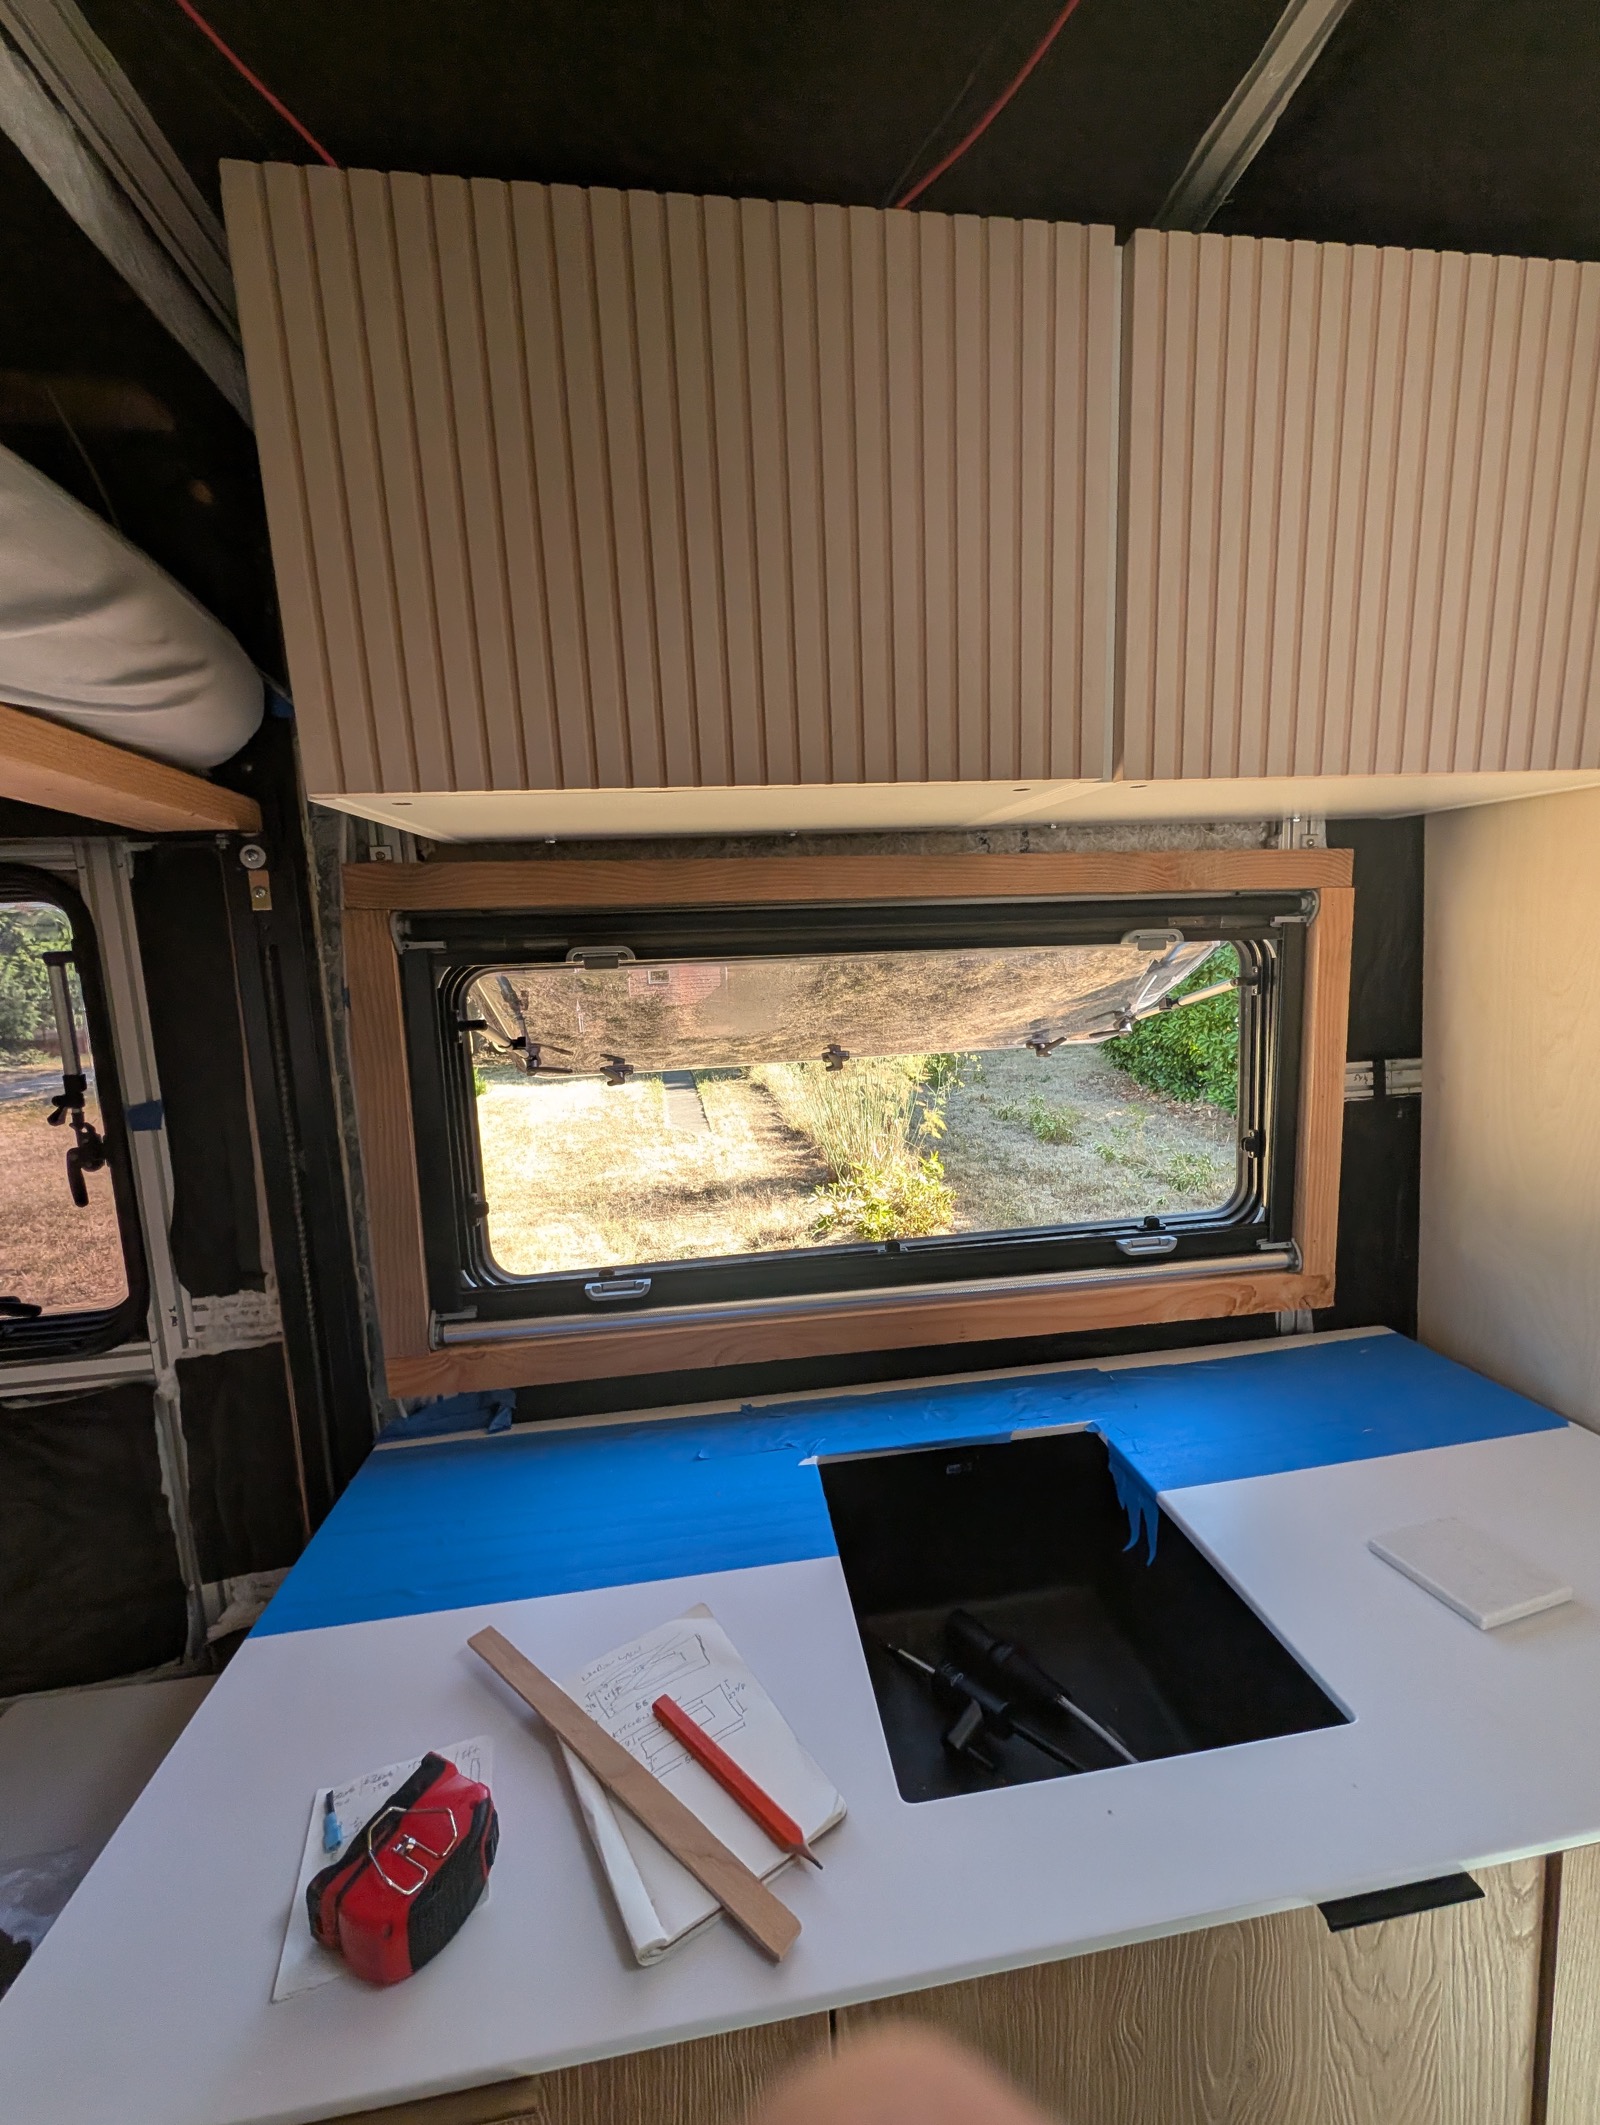
A TEMPLATE FRAME is up around the kitchen window, and it is the reference the poplar gets cut to. It is construction stock, fitted in place around the window with the pane opening through it, which proves the frame geometry: outer size, the reveal to the window, and that the awning pane and its latches clear the frame when open. The poplar rails copy this frame, then take the blind pocket and the 3/4 magnet groove the template does not have. Same discipline as the panel: numbers to template, template to fit, corrected template to final stock. Before the poplar is cut, mark onto this template anything the fit taught, and check the groove and the blind pocket do not collide in the same 1.5 of rail depth.
The kitchen panel is CUT and DRY-FIT, and the window dimensions are finally measured rather than assumed. Off the cut sheet: panel 56 x 27 7/8, cutout 41 3/4 x 15, with 5 7/8 above the cutout and 7 below, which sums to 27 7/8 exactly. The sketch does not give the left/right margin split; the drawing assumes centered, 7 1/8 a side, until measured. Every drawing on this page now uses the real numbers. Two consequences. The panel is lighter than designed for: 6.5 sq ft net and about 11 lb against the assumed 10 sq ft and 17 lb, so the magnet arithmetic now says 4 would hold it and the 8 drawn are 4x margin; fit fewer if it does not buzz. And the panel is 27 7/8 high, not 36: it spans counter to upper cabinet, not counter to ceiling, so the U-bracket detail stays but the shadow-gap question moves to the cabinet underside.
Home Depot run, $27.12: Titebond III 16 oz for laminating the rails, a roll of magnet tape, and an assortment of zinc round-head wood screws. Two notes for whoever builds this. The magnet tape is not the panel fixing. Flexible ferrite tape runs about 1 to 2 lb of pull per linear foot on steel, so a 30 in roll is a few pounds against the 34 lb this panel wants, and it is a soft compliant mount where the panel needs a hard one. The cup magnets are still to be ordered. Round-head screws will not work at the magnets. A cup magnet has a 90 degree countersink and needs a flat-head screw to sit flush; a round head stands proud and breaks the 3/16 plus 1/16 equals 1/4 stack that lets the panel bed flat. These screws are fine for the L brackets.
Rail stock bought at Mr Plywood: 4 lengths of 1x5 poplar, 10 ft each, 40 linear feet for $114. A 1x5 is 4.5" actual, which yields two 2" strips per board, so 80 feet of strip and about 40 feet of finished 2 x 1.5 rail once laminated. That covers the kitchen window and both lounge windows with margin. Poplar over a construction 2x3 for three reasons: it is dried to furniture moisture rather than 19%, it is clear so no knot lands in the magnet groove, and it holds the bracket screws better.